Every sysadmin has lost a long-running command to a dropped SSH connection at least once — a package compile, a large rsync, or worse, an interactive script you were halfway through. tmux (terminal multiplexer) solves this: your session runs on the server itself, independent of your SSH connection, and reattaching after a disconnect picks up exactly where you left off.
This guide covers starting and reattaching to sessions, splitting your terminal into panes, managing multiple named sessions for different projects, and a couple of settings worth customizing early.
Step 1: Why tmux Matters for Remote Work
Without tmux, closing your laptop lid or losing WiFi mid-SSH-session kills every process attached to that terminal — including whatever long-running command you were watching. With tmux, that command runs inside a session on the server; your SSH connection is just a window into it. Disconnect, reconnect an hour later, reattach, and the command is still running exactly as you left it.
Step 2: Install and Start a Session
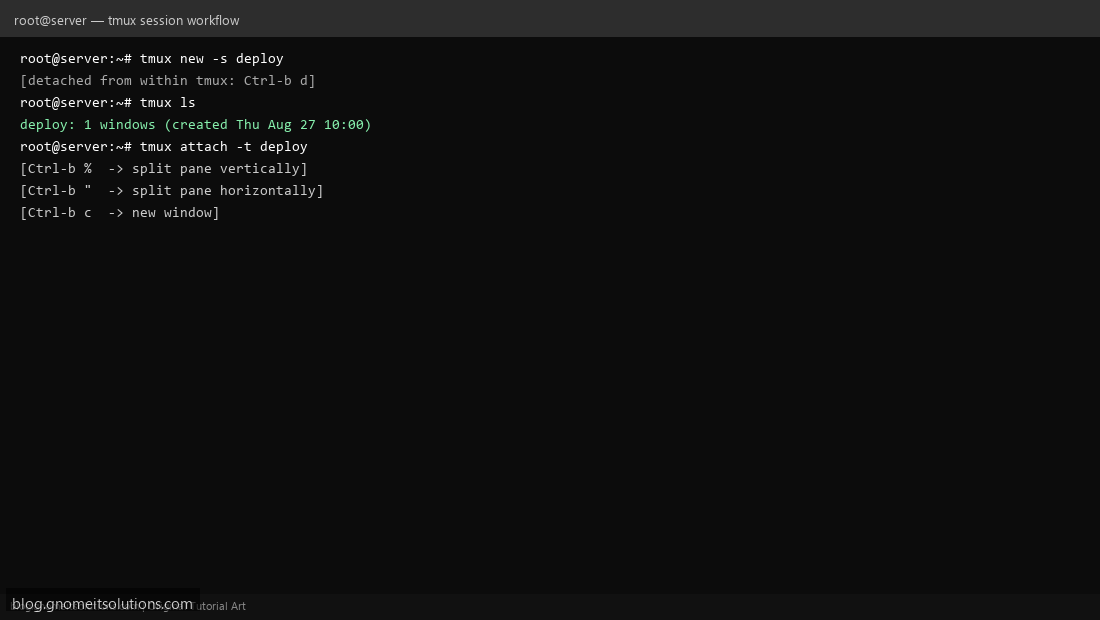
Install with your package manager (apt install tmux or dnf install tmux — it’s tiny and has no real downside to having installed everywhere). Start a named session: tmux new -s deploy. Naming sessions from the start (rather than accepting the default numeric name) pays off the moment you have more than one running.
Step 3: Detach and Reattach
Inside tmux, every command starts with a prefix key — Ctrl-b by default. Detach from the current session (leaving it running) with Ctrl-b d. List all running sessions from a fresh shell with tmux ls, and reattach to a specific one with tmux attach -t deploy. This is the entire core workflow — everything else is refinement on top of detach/reattach.
Step 4: Split Into Panes and Windows
Within a session, Ctrl-b % splits the current pane vertically (side by side), and Ctrl-b " splits horizontally (stacked). Navigate between panes with Ctrl-b then an arrow key. For fully separate screens within the same session, Ctrl-b c creates a new window — switch between windows with Ctrl-b followed by a number (0–9).
Step 5: Run Multiple Named Sessions for Different Projects
Keep unrelated work isolated: tmux new -s deploy for a deployment, tmux new -s monitoring for tailing logs, tmux new -s db-migration for a database task. tmux ls at any point shows every session with its window count — a quick way to remember what you left running and where.
Step 6: Scroll Back Through Output With Copy Mode
Regular terminal scrollback (mouse wheel or Shift+PageUp) often doesn’t work cleanly inside tmux by default. Enter copy mode with Ctrl-b [, then use arrow keys or vi-style j/k to scroll, Space to start a selection, and Enter to copy it. Press q to exit copy mode when done.
Step 7: Customize the Basics in tmux.conf
Create ~/.tmux.conf for a few quality-of-life changes: many people remap the prefix from Ctrl-b to Ctrl-a (closer to the home row, and the classic screen binding), enable mouse support with set -g mouse on so you can click to switch panes and scroll naturally, and increase history-limit beyond the small default if you regularly need to scroll back through long log output.
Step 8: A Practical Sysadmin Workflow
SSH into a server, tmux new -s work, split into two panes — one running htop or journalctl -f to watch system state live, the other for the actual commands you’re running. Detach at the end of the day with Ctrl-b d instead of closing everything. Next login, tmux attach -t work restores your exact working layout — no re-opening log tails, no lost context.
Key bindings cheat sheet
Ctrl-b d       detach from session
Ctrl-b %       split pane vertically
Ctrl-b "       split pane horizontally
Ctrl-b arrow   move between panes
Ctrl-b c       new window
Ctrl-b 0-9     switch to window N
Ctrl-b [       enter copy/scroll mode
Ctrl-b x       kill current pane
Session commands
tmux new -s NAME        # start a named session
tmux ls                 # list sessions
tmux attach -t NAME     # reattach
tmux kill-session -t NAME
Related tutorials
- SSH Key Authentication on Linux
- Linux Network Config with nmcli and netplan
- Git Pull Deploy Shell Script
Terminal screenshots are original illustrations created for Gnome IT Solutions (blog.gnomeitsolutions.com).