
Editing /etc/network/interfaces by hand is increasingly rare — most modern Linux distributions manage networking through one of two higher-level tools: NetworkManager (controlled via nmcli), the default on AlmaLinux, RHEL, Fedora, and most desktop distros; and netplan, Ubuntu Server’s YAML-based abstraction layer that itself configures NetworkManager or systemd-networkd underneath. Knowing both is unavoidable once you manage a mixed fleet.
This guide covers checking current network state, setting a static IP and DNS with each tool, building a simple bridge, and — critically — how to apply changes over SSH without locking yourself out of the box you’re configuring.
Step 1: Identify Which Tool Your Distro Uses
Check for NetworkManager first: systemctl status NetworkManager. If active, use nmcli — this is the case on AlmaLinux/RHEL/Fedora and modern Ubuntu Desktop. On Ubuntu Server, check ls /etc/netplan/ — if YAML files exist there, that’s your source of truth, and netplan itself decides whether NetworkManager or systemd-networkd is the actual backend applying it. Mixing manual edits to both layers on the same box causes configuration drift and confusing behavior — pick the one your distro actually uses and stick to it.

Step 2: Check Current Network State
Before changing anything, capture the working configuration in case you need to revert: nmcli con show lists NetworkManager connection profiles, ip addr show shows current interface IPs regardless of which tool manages them, and ip route show confirms your default gateway. Note the exact connection name (e.g. Wired connection 1) — nmcli commands reference profiles by this name, not the interface name.
Step 3: Set a Static IP With nmcli
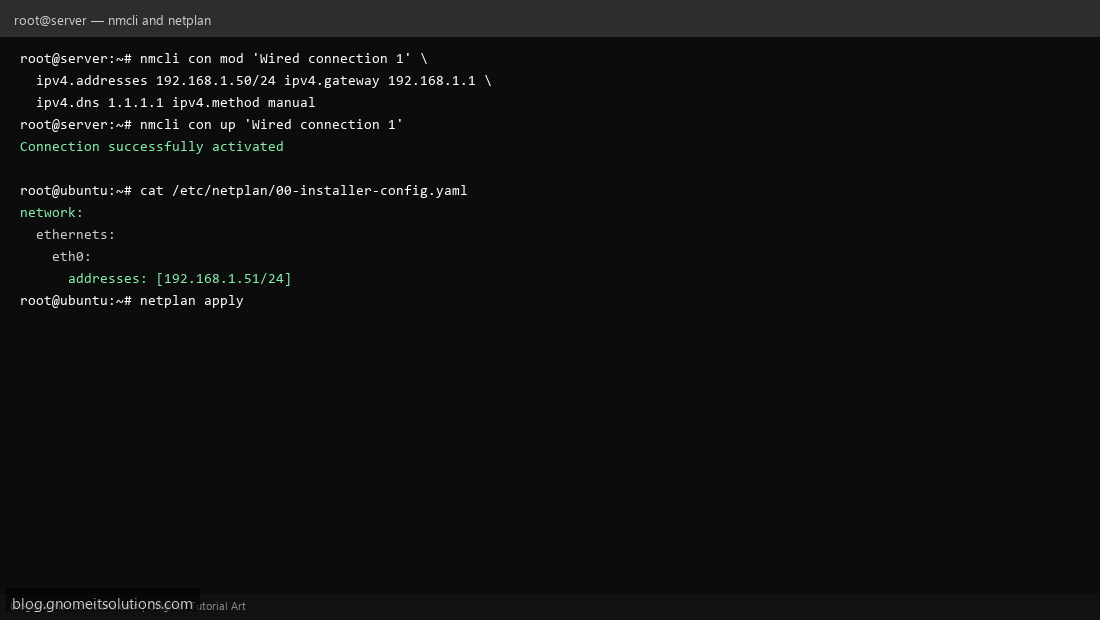
Modify the existing connection rather than creating a new one: nmcli con mod 'Wired connection 1' ipv4.addresses 192.168.1.50/24 ipv4.gateway 192.168.1.1 ipv4.method manual. This stages the change — nothing applies until you bring the connection back up in the next step.
Step 4: Set a Static IP With netplan
Edit the YAML file under /etc/netplan/ (commonly 00-installer-config.yaml): under the interface name, set addresses: [192.168.1.51/24], a routes entry for the gateway (or the newer gateway4 shorthand on older netplan versions), and confirm dhcp4: no so netplan doesn’t fight a DHCP lease for the same interface.
Step 5: Set DNS Servers
With nmcli: add ipv4.dns "1.1.1.1 8.8.8.8" to the same con mod command from Step 3. With netplan: add a nameservers: block under the interface with an addresses: list. Either way, confirm with resolvectl status (systemd-resolved) that the DNS servers actually took effect after applying — a common gotcha is setting DNS in the wrong connection/interface block when multiple interfaces exist.
Step 6: Build a Simple Bridge (Optional)
For hosting VMs (relevant if this Linux box also runs libvirt/KVM), a bridge lets guest VMs appear directly on the physical LAN. With nmcli: nmcli con add type bridge ifname br0, then nmcli con add type ethernet ifname eth0 master br0 to enslave the physical interface. With netplan, define a bridges: section listing the physical interface under interfaces:. Bridges effectively replace the physical interface’s own IP config — the bridge gets the IP, not the underlying NIC.
Step 7: Apply Changes Without Dropping SSH
This is the step that goes wrong the most: applying a bad network change over an SSH session to that same box can lock you out instantly. Safest approach — run the apply command inside a persistent terminal multiplexer (see our upcoming tmux guide) so a dropped connection doesn’t kill the command mid-apply, and always have out-of-band console access (IPMI, Proxmox VM console, cloud provider’s web console) ready before running nmcli con up or netplan apply on a remote box.
Step 8: Troubleshoot Common Issues
Change didn’t take effect: confirm you modified the profile netplan or NetworkManager is actually using — nmcli con show --active shows what’s live. netplan apply hangs or errors: run netplan --debug apply for verbose output, and always netplan try first — it applies temporarily and auto-reverts if you don’t confirm within a timeout, exactly the safety net you want when testing IP changes remotely. Static IP reverts after reboot: usually means ipv4.method wasn’t actually set to manual, so DHCP is still winning.
Command reference
# nmcli — set static IP + DNS
nmcli con mod 'Wired connection 1' \
  ipv4.addresses 192.168.1.50/24 \
  ipv4.gateway 192.168.1.1 \
  ipv4.dns "1.1.1.1 8.8.8.8" \
  ipv4.method manual
nmcli con up 'Wired connection 1'

# netplan — try before committing (auto-reverts if not confirmed)
netplan try
netplan apply
Example netplan YAML
network:
  version: 2
  ethernets:
    eth0:
      dhcp4: no
      addresses: [192.168.1.51/24]
      routes:
        - to: default
          via: 192.168.1.1
      nameservers:
        addresses: [1.1.1.1, 8.8.8.8]
Related tutorials
Terminal screenshots are original illustrations created for Gnome IT Solutions (blog.gnomeitsolutions.com).