Our kubeadm cluster guide built the cluster; deploying to it with kubectl apply by hand from a laptop doesn’t scale and leaves no record of who deployed what, when. GitOps flips the model: your Git repository is the single source of truth for what should be running, and ArgoCD continuously watches it, pulling and applying changes automatically — a deploy is just a git push.
This guide installs ArgoCD on the kubeadm cluster, connects a manifest repository, syncs an Application, and rolls back a bad deploy using ArgoCD’s built-in history.
Step 1: Understand the GitOps Model
In a traditional push-based pipeline, CI runs kubectl apply directly against the cluster — the cluster’s credentials have to live in CI. In GitOps, ArgoCD runs inside the cluster and pulls changes from Git on its own, comparing the repo’s desired state against what’s actually running and reconciling any drift. No cluster credentials need to ever leave the cluster.
Step 2: Install ArgoCD
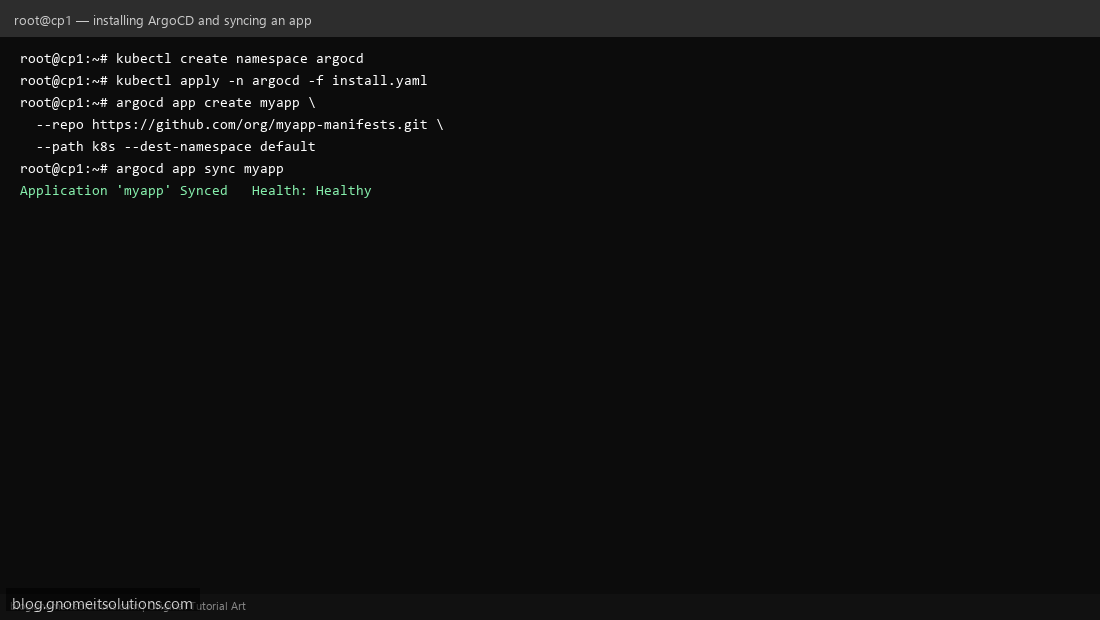
Create a namespace and apply the official install manifest: kubectl create namespace argocd, then kubectl apply -n argocd -f https://raw.githubusercontent.com/argoproj/argo-cd/stable/manifests/install.yaml. Wait for all pods in the argocd namespace to reach Running before proceeding.
Step 3: Access the ArgoCD UI and CLI
Retrieve the auto-generated initial admin password from the argocd-initial-admin-secret Kubernetes secret, port-forward the argocd-server service to reach the web UI, and install the argocd CLI on your workstation for scriptable operations — most of this guide’s remaining steps work identically from either the UI or CLI.
Step 4: Connect a Git Repository
Point ArgoCD at the repository holding your Kubernetes manifests — a public repo needs no extra config; a private one needs credentials added via argocd repo add with an SSH key or access token. This repo is now the authoritative source ArgoCD compares the live cluster against continuously.
Step 5: Create an Application
argocd app create myapp --repo REPO_URL --path k8s --dest-server https://kubernetes.default.svc --dest-namespace default defines an Application — ArgoCD’s core object tying a repo path to a destination cluster/namespace. The --path points at the directory within the repo containing the actual YAML manifests to apply.
Step 6: Sync and Watch Reconciliation
argocd app sync myapp triggers ArgoCD to pull the current repo state and apply it. Watch the Application’s status transition through Progressing to Synced / Healthy — these two independent states matter: Synced means the live state matches Git; Healthy means Kubernetes itself reports the resources as actually working (pods running, not just created).
Step 7: Push a Change and Watch Auto-Sync
Edit a manifest in the connected repo (bump an image tag, change a replica count) and push to the branch ArgoCD is tracking. If automated sync is enabled on the Application, ArgoCD detects the change within its polling interval (typically a few minutes, or instantly with a configured webhook) and applies it with no manual kubectl or argocd sync command needed — this is GitOps’ actual payoff.
Step 8: Roll Back Using ArgoCD History
Every sync is recorded — argocd app history myapp lists prior revisions, and argocd app rollback myapp REVISION_ID reverts the live cluster to that exact prior state. Because Git is the source of truth, a real rollback should also mean reverting the commit in Git itself (git revert) so the next auto-sync doesn’t just reapply the bad version again.
Command reference
# Install
kubectl create namespace argocd
kubectl apply -n argocd -f https://raw.githubusercontent.com/argoproj/argo-cd/stable/manifests/install.yaml

# Create and sync an app
argocd app create myapp --repo REPO_URL --path k8s --dest-namespace default
argocd app sync myapp

# History and rollback
argocd app history myapp
argocd app rollback myapp REVISION_ID
Related tutorials
- Kubernetes Cluster Setup with kubeadm
- Self-Hosted Container Registry with Harbor
- Install GitLab Runner on Linux
Terminal screenshots are original illustrations created for Gnome IT Solutions (blog.gnomeitsolutions.com).