Docker Hub’s free tier has pull-rate limits and no private-network guarantee for where your images physically live — fine for a hobby project, not always fine for a company with compliance requirements or an air-gapped environment. Harbor is a production-grade, self-hosted container registry with built-in vulnerability scanning, role-based access control, and image replication — the CNCF’s answer to “run your own Docker Hub.”
This guide installs Harbor via its Docker Compose-based installer, pushes and pulls an image, enables Trivy scanning, and sets up a scoped robot account for CI use.
Step 1: Why Run a Private Registry
A private registry gives you: control over where images physically live (relevant for compliance or air-gapped deployments), no dependency on a third party’s uptime or rate limits for your own internal images, and — with Harbor specifically — built-in vulnerability scanning so you know what CVEs are sitting in an image before it deploys, not after.
Step 2: Prerequisites
Harbor needs Docker and Docker Compose installed on the host, and — critically — a real TLS certificate for its hostname, since Docker refuses to push to an insecure registry by default without extra client-side configuration you don’t want to rely on long-term. Use our Certbot guide or an internal CA if this registry stays inside a private network.
Step 3: Configure harbor.yml
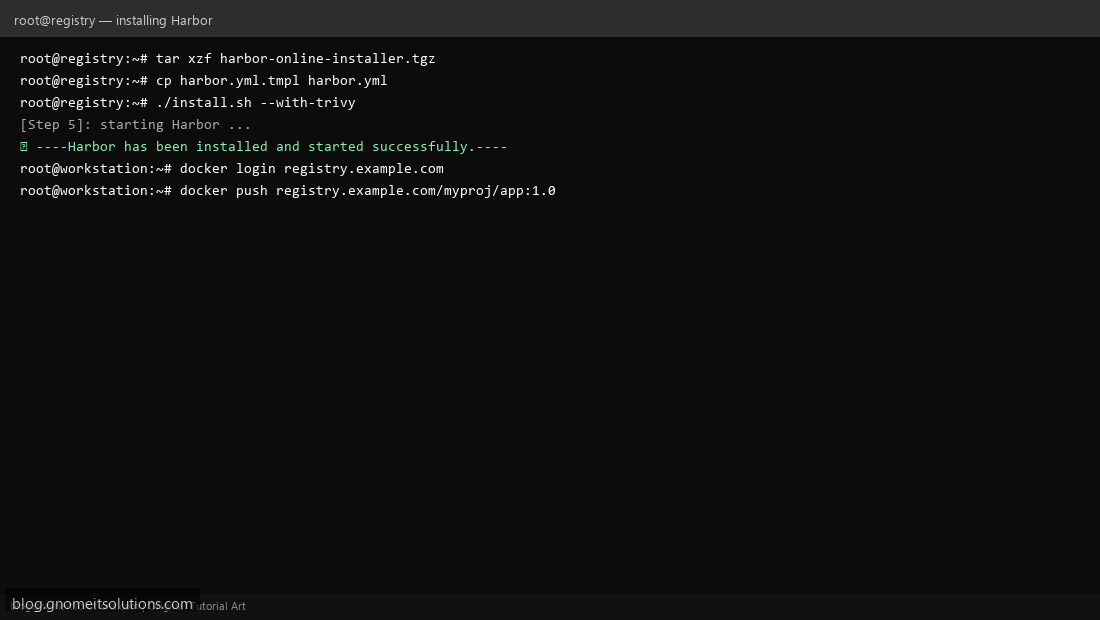
Download the Harbor offline or online installer, extract it, and copy harbor.yml.tmpl to harbor.yml. Set the hostname to your registry’s actual DNS name, and point certificate/private_key at your TLS cert files. Set the initial admin password here too — Harbor uses this only for the very first login.
Step 4: Run the Installer
./install.sh --with-trivy pulls Harbor’s component images and starts everything via Docker Compose — the --with-trivy flag bundles the vulnerability scanner in from the start rather than needing to add it later. This takes a few minutes; watch for the final success banner before assuming it’s ready.
Step 5: Log In and Create a Project
Browse to https://your-registry-hostname and log in with the admin credentials from harbor.yml. Create a Project — Harbor’s equivalent of a namespace grouping related repositories, with its own access control and settings (public or private, scan-on-push enabled or not).
Step 6: Push and Pull an Image
From any Docker host: docker login registry.example.com, tag an image with the registry’s hostname and project (docker tag myapp:1.0 registry.example.com/myproj/myapp:1.0), then docker push registry.example.com/myproj/myapp:1.0. Pull it on another host the same way any Docker Hub image would be pulled, just with the full registry hostname prefixed.
Step 7: Enable Vulnerability Scanning
With Trivy bundled in, every pushed image can be scanned automatically (enable Automatically scan images on push in the project’s config) or triggered manually from the image’s page in the UI. Review the CVE severity breakdown before promoting an image to production — this is the concrete benefit over a plain registry with no scanning at all.
Step 8: Set Up Robot Accounts for CI
Don’t use your personal admin login in a CI pipeline. Harbor’s Robot Accounts feature (Project → Robot Accounts → New) creates a scoped credential limited to specific actions (push, pull) on a specific project — exactly what a CI/CD pipeline needs, following the same least-privilege principle as the Proxmox and Vault scoped-token guides elsewhere on this site.
Command reference
# Install
cp harbor.yml.tmpl harbor.yml
./install.sh --with-trivy

# Push an image
docker login registry.example.com
docker tag myapp:1.0 registry.example.com/myproj/myapp:1.0
docker push registry.example.com/myproj/myapp:1.0
Related tutorials
Terminal screenshots are original illustrations created for Gnome IT Solutions (blog.gnomeitsolutions.com).