
Once you’re managing more than two or three Linux servers, doing the same apt install and config edits by hand on each one stops being reasonable — you forget a step, servers drift apart, and nobody remembers exactly what “web02” has installed that “web01” doesn’t. Ansible solves this without requiring an agent on every managed host — it just needs SSH.
This guide builds a small two-server lab: an inventory file, ad-hoc commands to sanity-check connectivity, a real playbook that installs and hardens nginx, and finally reorganizing that playbook into a reusable role.
Step 1: Install Ansible on the Control Node
Ansible only needs to be installed on one machine — the control node you run commands from. On Ubuntu/Debian: sudo apt install ansible. Managed hosts need nothing but Python and an SSH server, which almost every Linux distro ships with by default.

Step 2: Set Up SSH Key Access to Every Managed Host
Generate a dedicated key for Ansible (ssh-keygen -f ~/.ssh/ansible_key) and copy it to each managed host: ssh-copy-id -i ~/.ssh/ansible_key.pub deploy@web01. Ansible connects over plain SSH, so if you can SSH in manually without a password prompt, Ansible can too.
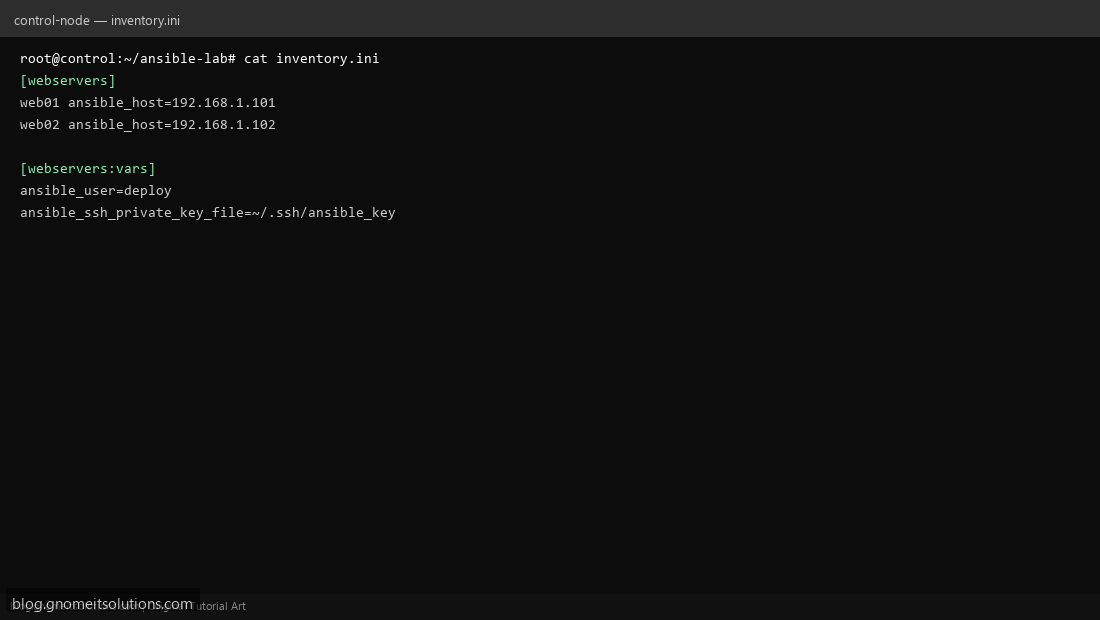
Step 3: Create the Inventory File
The inventory tells Ansible which hosts exist and how to group them. Create inventory.ini with a [webservers] group listing your hosts, plus a [webservers:vars] section for the SSH user and key path so you don’t repeat them on every command.
Step 4: Test Connectivity With an Ad-Hoc Command
Before writing any YAML, confirm everything is wired up: ansible webservers -m ping. This uses the built-in ping module (not ICMP — it’s an SSH connectivity + Python check) and should return SUCCESS / “pong” for every host in the group.

Step 5: Write Your First Playbook
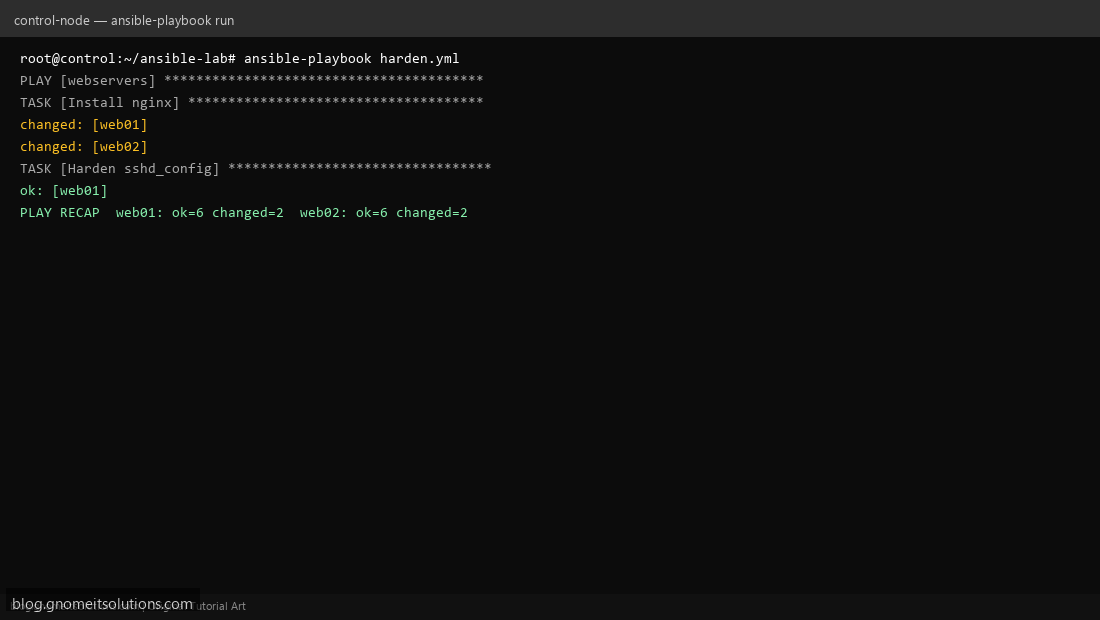
Create harden.yml with a single play targeting webservers, using become: true for sudo, and two tasks: apt: name=nginx state=present to install nginx, and a lineinfile or template task to disable password SSH login in /etc/ssh/sshd_config.
Step 6: Dry-Run With –check Before Applying
Run ansible-playbook harden.yml --check --diff first. This simulates the run and shows what would change without touching anything — invaluable before you trust a new playbook against real servers. Only drop --check once the diff output looks correct.
Step 7: Run It for Real and Read the Recap
Run ansible-playbook harden.yml. Each task reports ok (no change needed, already matches the desired state), changed (it made a change), or failed. The PLAY RECAP at the end summarizes counts per host — that’s your quick pass/fail signal.
Step 8: Reorganize Into a Reusable Role
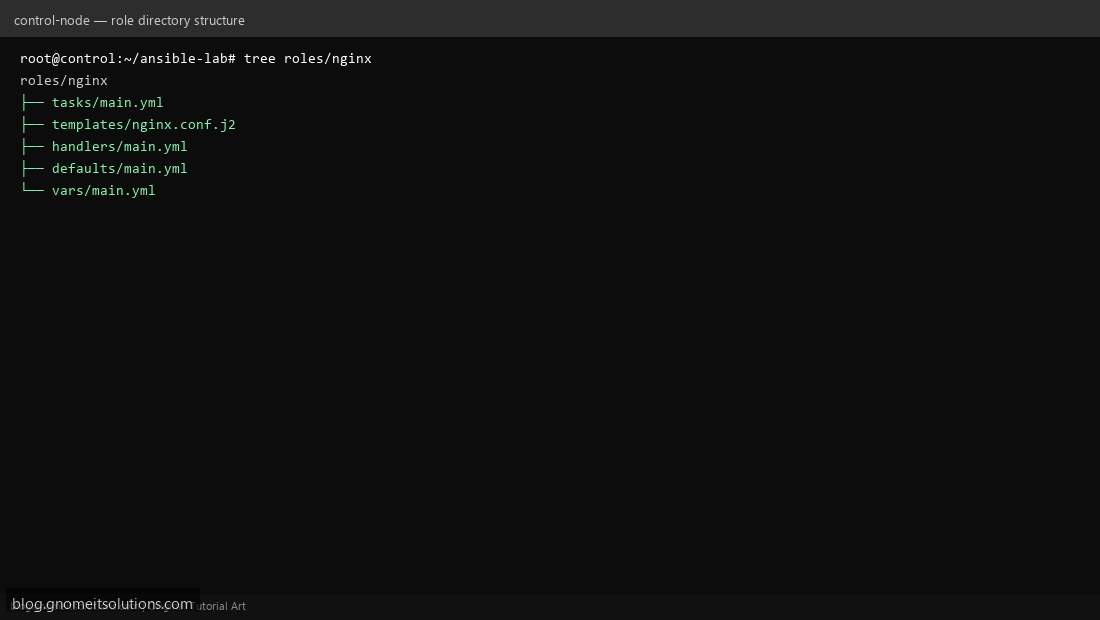
Once a playbook grows past a handful of tasks, split it into a role: ansible-galaxy init roles/nginx creates the standard tasks/, templates/, handlers/, defaults/ layout. Move your tasks into roles/nginx/tasks/main.yml and your config file into a Jinja2 .j2 template — now the same role can be reused across projects.
Example harden.yml
---
- name: Harden and configure web servers
  hosts: webservers
  become: true
  tasks:
    - name: Install nginx
      apt:
        name: nginx
        state: present
        update_cache: true

    - name: Disable SSH password authentication
      lineinfile:
        path: /etc/ssh/sshd_config
        regexp: '^#?PasswordAuthentication'
        line: 'PasswordAuthentication no'
      notify: Restart sshd

  handlers:
    - name: Restart sshd
      service:
        name: sshd
        state: restarted
Idempotency — the core idea
Every Ansible module is designed to be idempotent: running the same playbook twice in a row should report the second run as all ok, with nothing changed. If a task keeps showing changed on every run, something in it isn’t idempotent — that’s usually a sign to use a proper module instead of a raw shell task.
Related tutorials
Terminal screenshots are original illustrations created for Gnome IT Solutions (blog.gnomeitsolutions.com).