Every Linux admin eventually needs to add a new disk, and the three main tools for partitioning it — fdisk, gdisk, and parted — each have a different history and a different sweet spot. Reaching for the wrong one for the partition table type you actually have is the most common source of confusion here.
This guide covers when to use each tool, walks through creating a partition with all three, and covers the formatting/mounting/fstab steps that come after — including the safe way to reference a disk that won’t break if device names shift after a reboot.
Step 1: MBR vs GPT — Know Which You Have
MBR (Master Boot Record) is the older partition table format, limited to 4 primary partitions and 2 TiB disks. GPT (GUID Partition Table) is the modern standard, supporting many more partitions and disks far larger than 2 TiB. Check which a disk uses: parted /dev/sdb print shows Partition Table: gpt or msdos (MBR) directly in its output.
Step 2: Identify the Disk and Any Existing Table
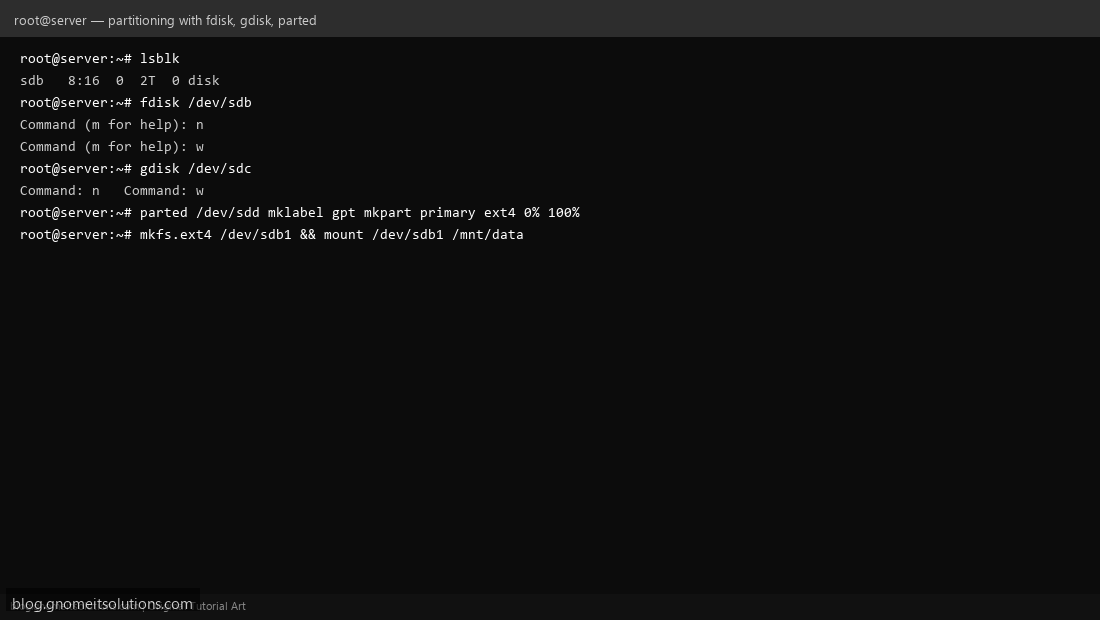
lsblk lists all block devices and their current partitions — confirm you have the right device name (/dev/sdb, not /dev/sdb1, which would already be a partition) before running anything destructive. fdisk -l /dev/sdb or parted /dev/sdb print shows whether a partition table already exists and what’s on it.
Step 3: Partition With fdisk (MBR, Simple Cases)
fdisk /dev/sdb opens an interactive prompt: n creates a new partition (accept defaults for a single whole-disk partition), p previews the table before committing, and w writes the change to disk. fdisk can create GPT tables on modern versions too, but it’s most associated with MBR and simpler single/dual-partition layouts.
Step 4: Partition With gdisk (GPT-Focused)
gdisk /dev/sdc uses nearly identical commands to fdisk (n, p, w) but is purpose-built for GPT disks and handles GPT-specific concepts (partition GUIDs, protective MBR) more explicitly. If you’re specifically working with a GPT disk and want a tool that won’t quietly assume MBR semantics, gdisk is the safer choice over plain fdisk on older systems.
Step 5: Partition With parted (Scriptable, Large Disks)
parted supports both MBR and GPT and, unlike fdisk/gdisk, can be driven non-interactively — useful for automation: parted /dev/sdd mklabel gpt mkpart primary ext4 0% 100% creates a GPT table and one partition spanning the whole disk in a single command. parted also handles disks larger than 2 TiB natively, which plain fdisk on very old versions could not.
Step 6: Format and Mount the New Partition
Once partitioned, create a filesystem: mkfs.ext4 /dev/sdb1 (or mkfs.xfsmkdir /mnt/data && mount /dev/sdb1 /mnt/data. Confirm with df -h /mnt/data that it’s mounted with the expected size.
Step 7: Persist the Mount Safely in /etc/fstab
Never reference a partition by device name (/dev/sdb1) in /etc/fstab — device letters can shift after a reboot if disks are added/removed, silently mounting the wrong disk at that path. Use the stable UUID instead: get it with blkid /dev/sdb1, then add a line like UUID=xxxx-xxxx /mnt/data ext4 defaults 0 2. Test with mount -a before rebooting to catch a syntax error while you can still fix it easily.
Step 8: Resize or Delete a Partition Safely
Shrinking a filesystem is riskier than growing one — always back up first. To grow: extend the partition with parted or growpart, then grow the filesystem on top (resize2fs /dev/sdb1 for ext4, xfs_growfs for XFS — note XFS cannot shrink at all, only grow). Before deleting any partition, confirm nothing currently references it in /etc/fstab or active mounts, or the system may fail to boot cleanly afterward.
Quick tool reference
- fdisk: simple, interactive, fine for MBR or basic GPT use
- gdisk: same interface as fdisk, purpose-built for GPT
- parted: scriptable, handles both table types, best for automation and very large disks
Command reference
# Identify disks
lsblk

# Scriptable GPT partition + format
parted /dev/sdd mklabel gpt mkpart primary ext4 0% 100%
mkfs.ext4 /dev/sdd1

# Safe fstab entry
blkid /dev/sdd1
echo 'UUID=xxxx /mnt/data ext4 defaults 0 2' >> /etc/fstab
mount -a
Related tutorials
Terminal screenshots are original illustrations created for Gnome IT Solutions (blog.gnomeitsolutions.com).