
A generic printed call script doesn’t know the lead’s name, product interest, or previous call notes —
ViciDial’s built-in Script feature does, by inserting live merge fields
pulled directly from the lead record into text the agent sees on screen during the call. This turns a
static script into something that reads naturally with real lead data filled in automatically.
This guide creates a script from scratch, inserts merge fields, links it to a campaign, and covers
testing it from the agent’s own screen.
Step 1: Understand What the Script Feature Does
ViciDial’s script editor produces text that renders on the agent’s call screen during a live call, with placeholders automatically substituted from the current lead’s data — first name, product interest, prior notes, whatever fields your lead list includes. This is separate from IVR scripts or dialplan logic; it’s purely agent-facing on-screen text.

Step 2: Find the Script Management Page
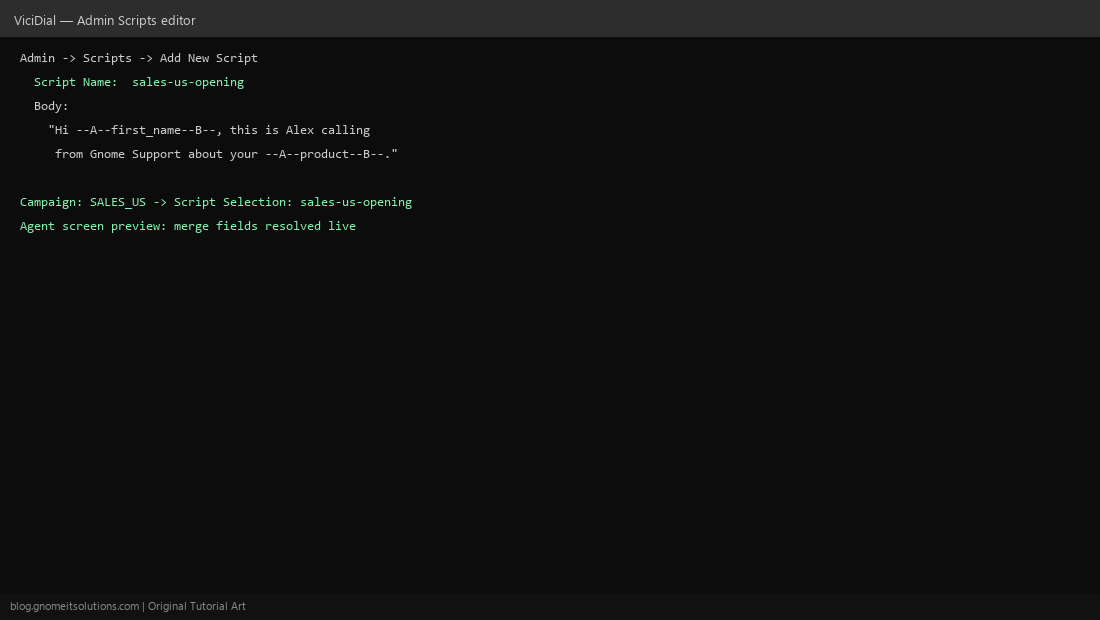
Admin → Scripts lists existing scripts and lets you add a new one. Give it a clear, descriptive name (e.g. sales-us-opening) — script names are how you’ll identify which one to attach to a campaign later, so avoid vague names once you have more than a couple.
Step 3: Write the Base Script Text
Enter the script body as plain text with basic formatting — this is what agents see as a starting point before any merge fields resolve. Keep opening lines short; a wall of text is harder for a new agent to read naturally on a live call than a structured set of short sections (opening, qualifying questions, close).
Step 4: Insert Merge Fields
ViciDial merge fields follow a --A--fieldname--B-- pattern — for example, --A--first_name--B-- resolves to the current lead’s first name at call time. Common fields include first_name, last_name, and any custom field defined on your lead list, letting a line like “Hi –A–first_name–B–, this is Alex calling about your –A–product–B–” read naturally for every lead without manual editing.
Step 5: Build Branching Scripts for Different Scenarios
Rather than one giant script with every possible branch inline, create separate scripts for distinct scenarios — an initial-contact script versus a callback script, or different scripts per product line within the same campaign — and let agents (or campaign configuration) select the right one rather than scrolling through irrelevant sections.
Step 6: Link the Script to a Campaign
In the campaign’s detail settings, set the Script field to the script you created — this is what determines which script an agent sees by default when handling a call from that campaign. If a campaign supports multiple scripts, confirm the selection mechanism (dropdown on the agent screen, or automatic based on a lead field) is configured the way you intend.
Step 7: Test From the Agent Interface
Log in as a test agent and take a call (or use a test lead) against the campaign — confirm merge fields resolve to real data rather than showing the literal --A--fieldname--B-- placeholder text, which usually means a typo in the field name or that field genuinely doesn’t exist on that lead list.
Step 8: Keep Scripts Maintainable
As campaigns and offers change, scripts drift out of date quickly if nobody owns them — assign a specific person responsible for script accuracy, and review scripts whenever a campaign’s offer, pricing, or compliance language changes. A stale script quoting an outdated promotion is a common, avoidable source of agent-customer friction.
Quick reference
Merge field pattern:
--A--fieldname--B--

Example:
Hi --A--first_name--B--, this is Alex calling from
Gnome Support about your --A--product--B--.
Related tutorials
Image credits: All illustrations are original terminal/config mockups created for
Gnome IT Solutions — not screenshots from any third-party site. Tutorial text © Gnome IT Solutions.