Most ViciDial phone documentation, including our own
phone login
troubleshooting guide, assumes a hardware desk phone or a pre-registered SIP softphone is already
sitting on an extension before an agent ever logs into the agent screen. That assumption breaks down the
moment you hire remote agents who only have a laptop and a browser. A proper ViciDial WebRTC
softphone setup replaces the desk phone entirely: the agent’s browser itself becomes the SIP
endpoint, registering over an encrypted WebSocket straight to Asterisk with no external hardphone, ATA, or
third-party softphone install required.
Getting there means touching four layers that never come into play with a traditional SIP extension:
Asterisk’s HTTP/WebSocket server, a PJSIP endpoint template built specifically for webrtc=yes
media (DTLS-SRTP, ICE, RTCP-mux), the phones table record ViciDial uses to generate that
endpoint, and the browser’s own microphone permission model, which refuses to cooperate at all unless every
URL involved is served over valid TLS. Skip any one of these and agents get a phone icon that never turns
green, or audio that connects one-way and then drops.
This guide walks through the full chain in order — server-side transport, codec negotiation, the phone
and user records in the admin UI, and the browser-side verification and troubleshooting steps that are
unique to WebRTC. If you also rotate the same physical extension between shifts, pair this with our
sticky agent configuration
guide so the WebRTC phone record stays bound to the right agent instead of getting reassigned every
login.
Step 1: Confirm the TLS and Network Prerequisites
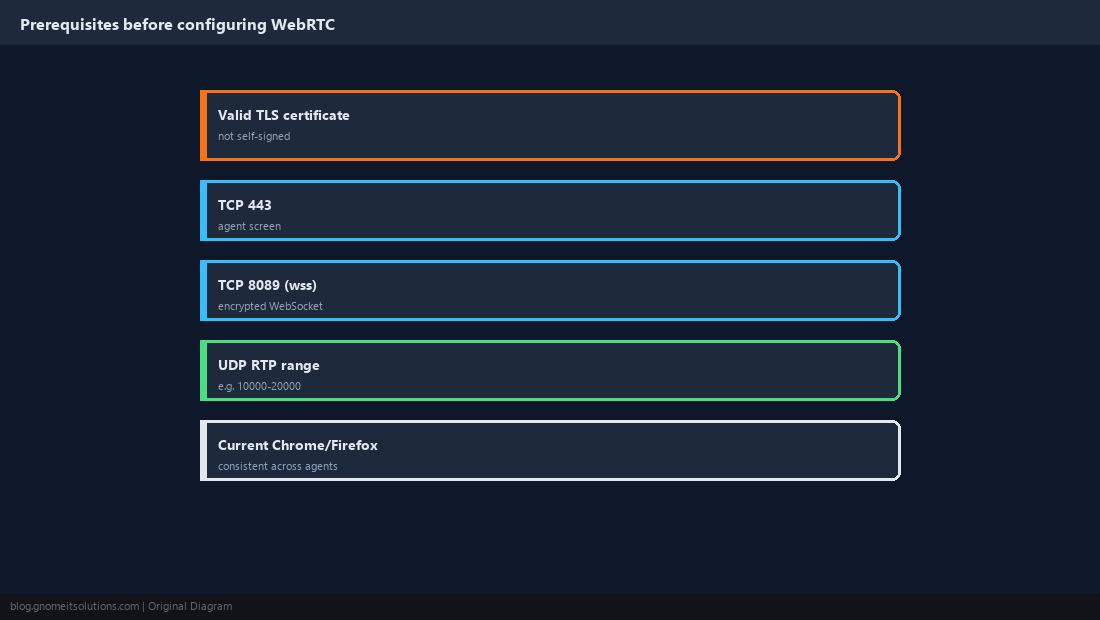
Before you edit a single config file, confirm three things or you’ll spend hours debugging a browser that silently refuses to work. First, every URL agents touch — the ViciDial agent screen and the Asterisk WebSocket port — has to be served over valid TLS, because Chrome and Firefox block getUserMedia() microphone access and secure WebSocket connections from any page that isn’t HTTPS; a self-signed certificate technically works but forces a manual per-browser trust step, so a Let’s Encrypt certificate via certbot is worth the ten minutes it takes. Second, open TCP 443 for the web UI, TCP 8089 for the encrypted WebSocket (wss://), and a UDP RTP range such as 10000-20000 for the actual SRTP media stream — all three, not just the first two, or agents will register but never hear audio. Third, standardize on a current Chrome or Firefox release across your agent fleet; older Edge or Safari builds handle DTLS-SRTP negotiation inconsistently enough that it isn’t worth supporting them for a production call center softphone.
Step 2: Turn On the Secure WebSocket Transport in Asterisk
The browser doesn’t speak plain SIP-over-UDP, so Asterisk needs a TLS-wrapped WebSocket listener before any WebRTC phone can reach it. Add the TLS settings to http.conf and a WebSocket transport to pjsip.conf, pointing the certificate paths at the same pair your web server already uses:
# /etc/asterisk/http.conf
enabled=yes
tlsenable=yes
tlsbindaddr=0.0.0.0:8089
tlscertfile=/etc/asterisk/keys/fullchain.pem
tlsprivatekey=/etc/asterisk/keys/privkey.pem

# /etc/asterisk/pjsip.conf
[transport-wss]
type=transport
protocol=wss
bind=0.0.0.0
This gives PJSIP a WebRTC-capable transport to hand endpoints. Reload both modules so the change takes effect, then confirm TLS is listed as enabled on port 8089 before moving on:
asterisk -rx "http reload"
asterisk -rx "pjsip reload"
asterisk -rx "http show status"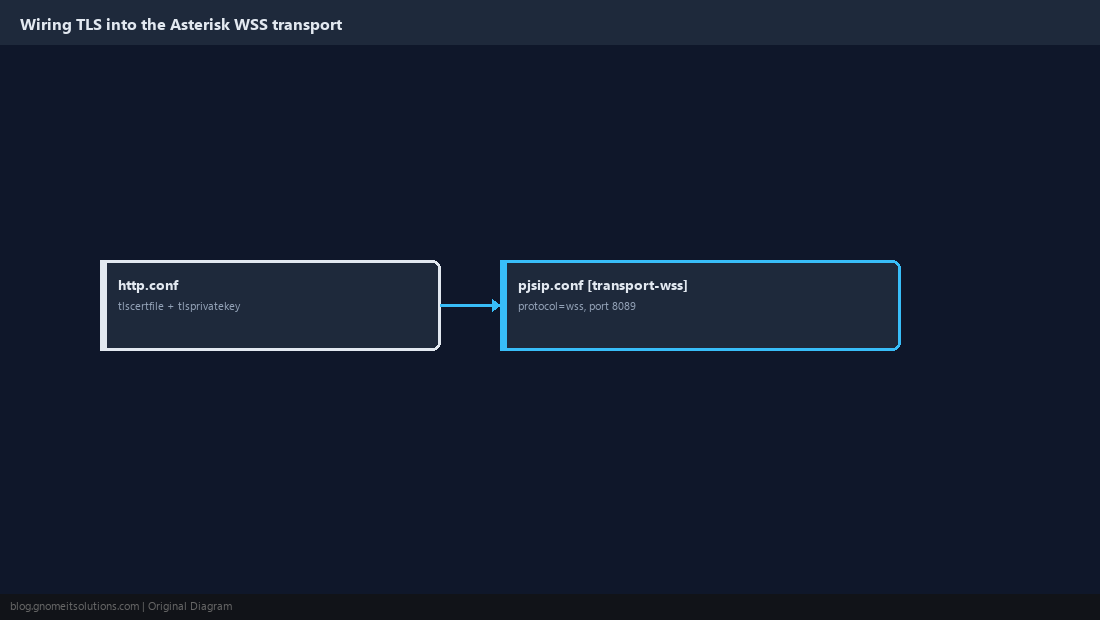
Step 3: Build a Dedicated WebRTC Endpoint Template
Create a PJSIP template that every WebRTC phone will inherit from, rather than hand-tuning each extension individually. Set webrtc=yes on the template, which pulls in sane defaults for ICE and AVPF, but still spell out media_encryption=dtls, dtls_verify=fingerprint, dtls_setup=actpass, ice_support=yes, and rtcp_mux=yes explicitly so you can see and adjust each one later. Set direct_media=no on this template without exception — a browser endpoint cannot send RTP directly to a second phone the way two desk phones can, and leaving direct media on is the single most common cause of calls that connect and then go silent. Finish with force_rport=yes, rewrite_contact=yes, and transport=transport-wss so the template only ever binds to the WebSocket transport from Step 2.
[webrtc-phone](!)
type=endpoint
transport=transport-wss
webrtc=yes
media_encryption=dtls
dtls_verify=fingerprint
dtls_setup=actpass
ice_support=yes
rtcp_mux=yes
direct_media=no
force_rport=yes
rewrite_contact=yes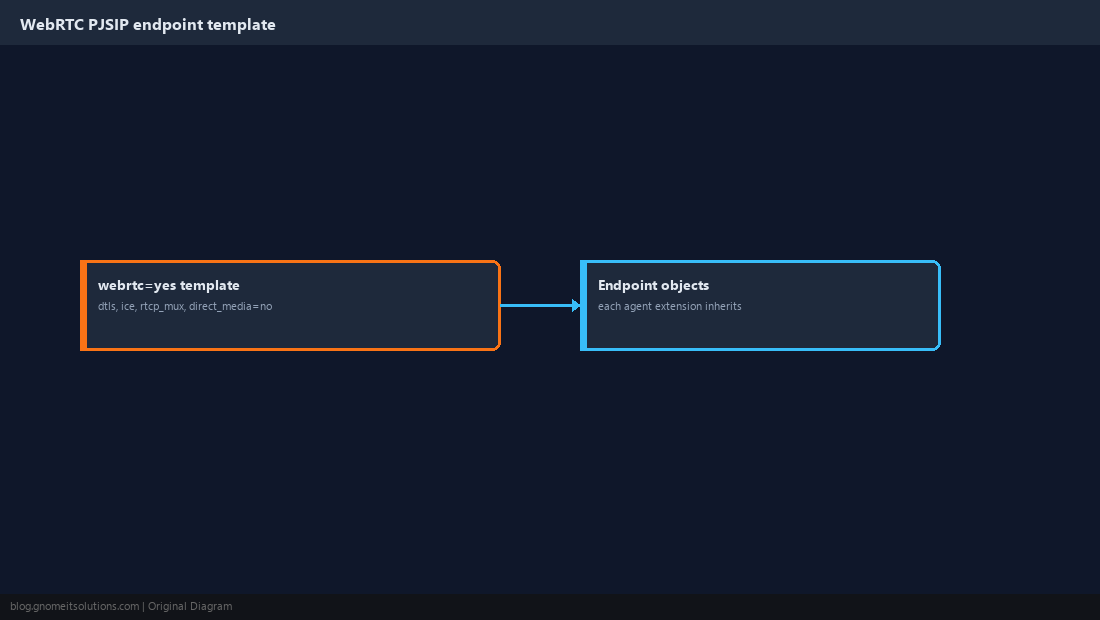
Step 4: Set Codecs So Browser and Desk-Phone Calls Both Work
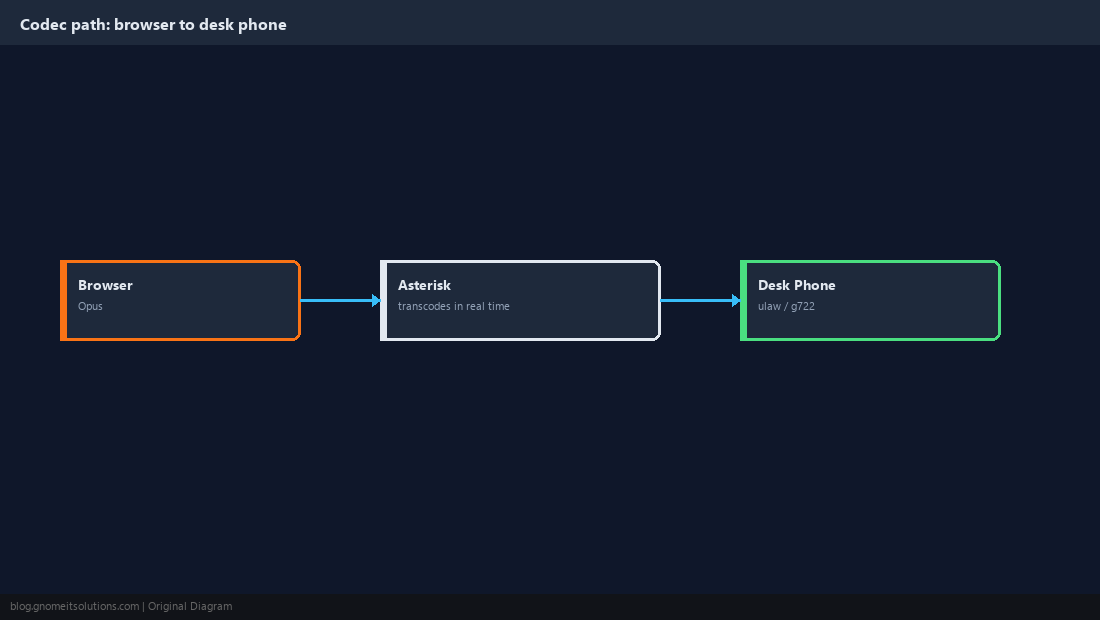
Add codec priority to the WebRTC template, in this order, since every modern browser offers Opus first and only falls back to G.722 or ulaw when forced:
allow=!all
allow=opus
allow=g722
allow=ulaw
This matters because most of your existing hardware phones and outbound trunks still negotiate plain ulaw, so a call between a WebRTC agent and a non-WebRTC leg forces Asterisk to transcode in real time. Confirm the codec module is actually loaded — on some minimal ViciDial installs it isn’t installed by default:
asterisk -rx "module show like opus"Budget CPU headroom on the Asterisk box accordingly, since transcoding dozens of simultaneous Opus-to-ulaw calls is measurably heavier than straight passthrough. Skip this step and the phone will still register fine, but calls will fail to connect with a codec negotiation error visible in the Asterisk full log.
Step 5: Create the Phone Record in Admin -> Phones
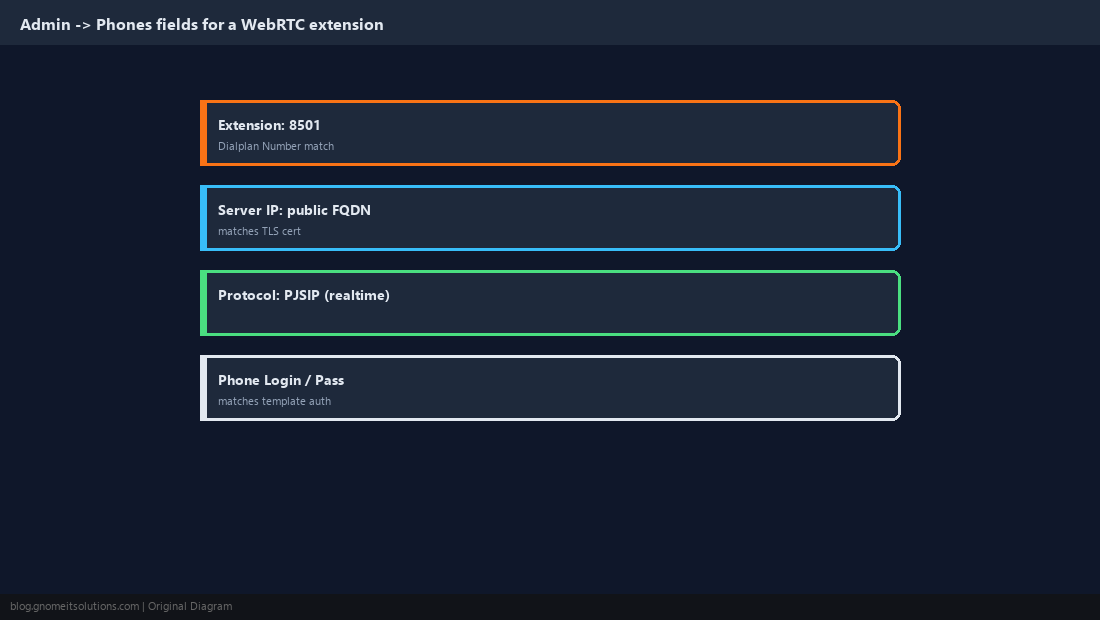
In the admin UI, go to Admin → Phones → Add a New Phone and fill in an extension dedicated to this softphone, such as 8501, with the Dialplan Number field matching it exactly. Set Server IP to the same public FQDN your TLS certificate was issued for — not an internal 10.x or 192.168.x address — because the browser validates the certificate against whatever hostname it’s told to connect to. Choose the PJSIP protocol option your ViciDial build exposes for realtime endpoints, set the Phone Login and Phone Pass to credentials matching the naming your template expects, and leave registration-related fields at their default since a browser endpoint authenticates at login time rather than maintaining a standing UDP registration. Save the record, then check /etc/asterisk/pjsip_additional.conf a minute later to confirm ViciDial’s config-sync process actually wrote the new endpoint before you try to log an agent in against it.
Step 6: Bind the Phone to the Agent’s User Record
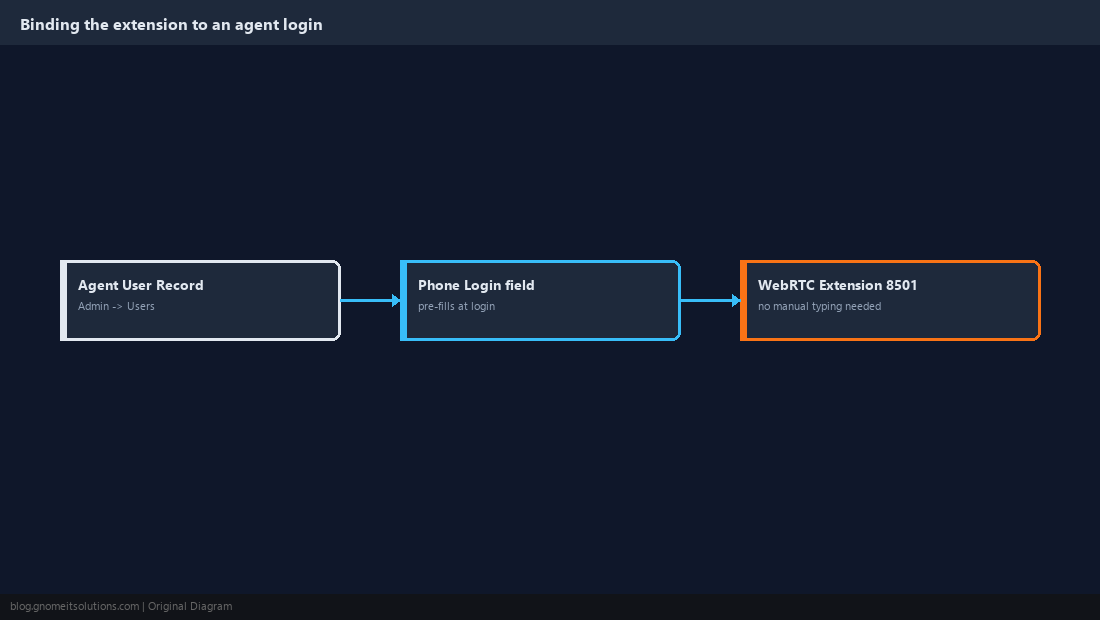
Open Admin → Users, edit the agent who will use this softphone, and set the Phone Login field to the extension and password you just created in Step 5. This pre-fills the phone credentials automatically at agent login instead of leaving the agent to type an extension number correctly every shift, which is where a surprising number of WebRTC “it won’t register” tickets actually originate. If more than one agent shares this workstation across shifts, decide now whether the extension stays fixed to one person or floats between logins — floating extensions are simpler to provision but make call recordings and stats harder to trace back to an individual agent. Save the user record and confirm the campaign this agent logs into doesn’t have a conflicting dial-method restriction left over from when the seat used a hardware phone.
Step 7: Log In and Verify Registration End to End
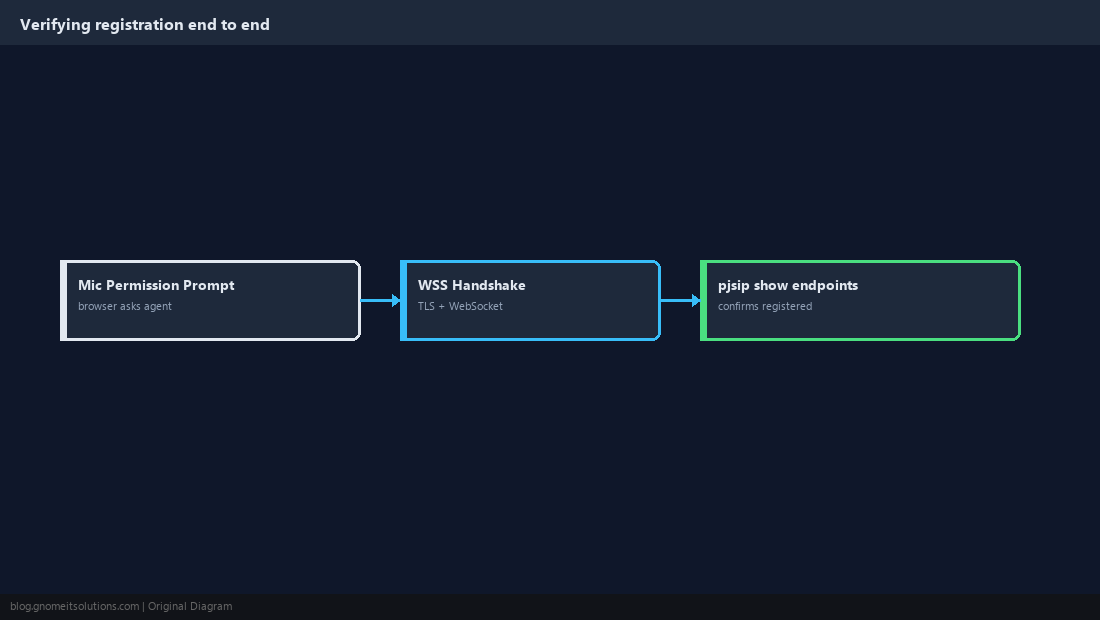
Have the agent open the agent screen over https:// and log in normally; the browser will prompt “Use your microphone” and the login will effectively stall until that’s accepted, so warn agents ahead of time. Once accepted, the built-in softphone panel should report a connected state within a few seconds — if it hangs longer than that, it’s almost always the WSS handshake failing, not a ViciDial application problem. On the server, confirm the endpoint actually came up, and during a live test call verify a channel exists with an active RTP stream rather than just a signaling leg:
asterisk -rx "pjsip show endpoints"
asterisk -rx "pjsip show channels"
Place one inbound and one outbound test call before releasing the extension to production, since ICE and DTLS problems often only surface in one call direction.
Step 8: Troubleshoot the Failures That Are Unique to WebRTC
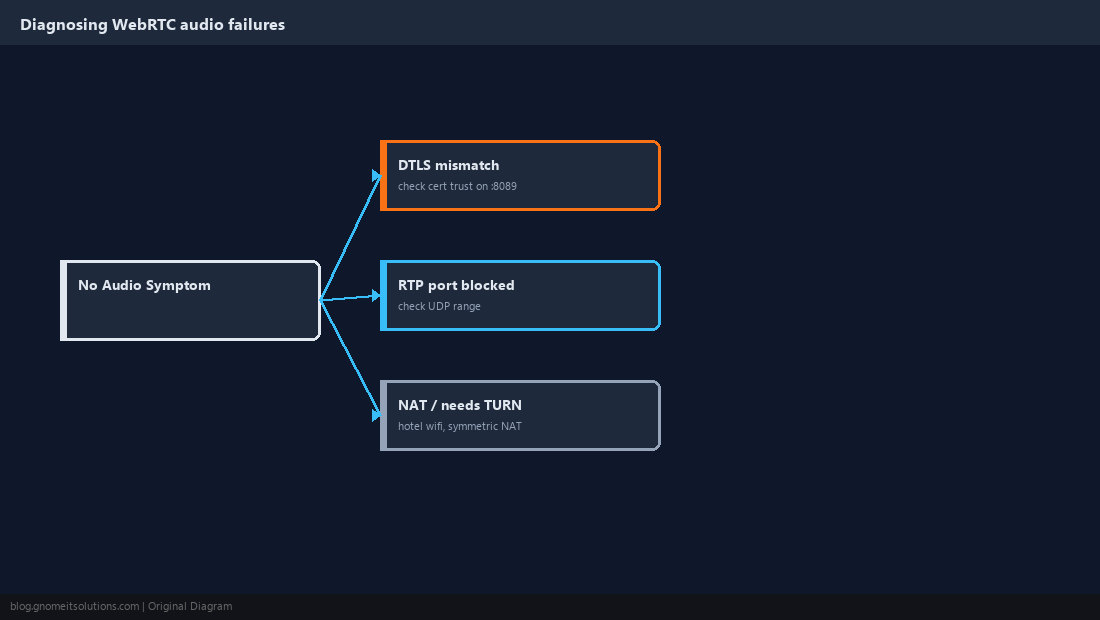
Most WebRTC-specific failures fall into four buckets. A browser blocking the page entirely usually means mixed content — the agent screen itself isn’t fully HTTPS, or some asset on it is still loading over plain HTTP. A registration that never completes is often the self-signed certificate on port 8089 never having been trusted, since accepting the certificate warning on port 443 does not extend to the separate WSS port — have the agent visit https://yourfqdn:8089/ws directly once and accept the warning there, or switch to a certificate a real CA issued. One-way or no audio after the call connects points to a DTLS-SRTP mismatch or the UDP RTP range from Step 1 being blocked somewhere between the browser and Asterisk, which is common on hotel Wi-Fi or mobile hotspots doing symmetric NAT, and may require a TURN server or an external_media_address setting to resolve. If the extension registers but calls fail immediately with a dialplan error, double-check that the extension actually exists in the context ViciDial expects to route it through — the same class of context mismatch that breaks a hardware phone breaks a browser phone just as easily, it’s just less obvious to spot because you’re staring at a browser tab instead of a desk phone’s screen.
Quick Reference: Minimal WebRTC Endpoint Template
[webrtc-phone](!)
type=endpoint
transport=transport-wss
webrtc=yes
media_encryption=dtls
dtls_verify=fingerprint
dtls_setup=actpass
ice_support=yes
rtcp_mux=yes
direct_media=no
force_rport=yes
rewrite_contact=yes
allow=!all,opus,g722,ulaw
Pre-flight checklist before provisioning the first agent:
- Valid TLS certificate covering the FQDN used for both the agent screen and port 8089
- TCP 443, TCP 8089, and the UDP RTP range open in both directions
webrtc=yestemplate applied withdirect_media=no- Opus codec module loaded and confirmed with
module show like opus - Phone record’s Server IP set to the public FQDN, not an internal address
- Phone Login bound to the agent’s user record so no extension is typed manually
Related tutorials
Image credits: All illustrations are original terminal/config mockups created for
Gnome IT Solutions — not screenshots from any third-party site. Tutorial text © Gnome IT Solutions.