Call recording is often a compliance requirement, not just a nice-to-have — but every recorded call is
a permanent file, and a busy call center can generate hundreds of gigabytes a month. Left unmanaged, a
dialer’s local disk eventually fills up entirely, sometimes taking down live calls with it. This guide
covers where recordings live, how to size for their growth, and how to move older recordings to cheaper
offsite storage without breaking the ability to retrieve one on demand.
Step 1: Know Where Recordings Are Stored
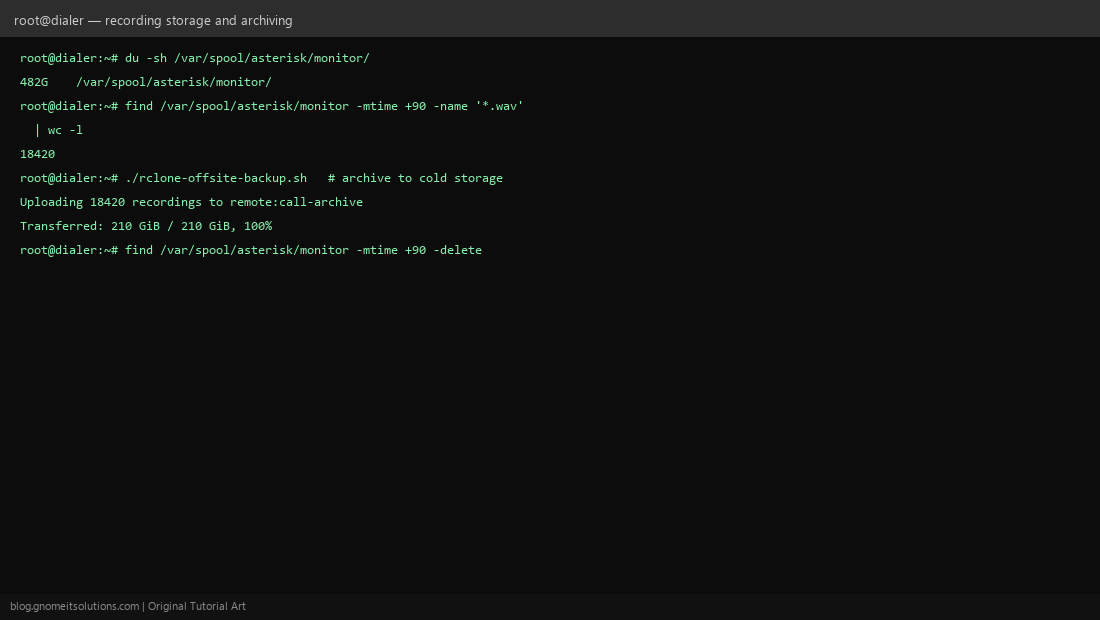
By default, ViciDial’s recordings (captured via Asterisk’s MixMonitor application) land under /var/spool/asterisk/monitor/, organized into date-based subdirectories. Check current usage with du -sh /var/spool/asterisk/monitor/ — this is the number that determines how much runway you have before disk pressure becomes a real problem.
Step 2: Enable Recording at the Campaign Level
Recording is controlled per campaign (Admin → Campaigns → Detail → recording settings), with options for always recording, recording only on specific dispositions, or leaving it off. Choose the audio format deliberately — compressed formats (like GSM) use far less disk than uncompressed WAV at the cost of some audio quality, a real trade-off worth making consciously rather than accepting whatever the default happens to be.
Step 3: Understand File Naming and Retrieval
Recording filenames typically encode the date, time, and lead/call identifiers, letting the admin UI’s recording search page (Admin → Recordings, or via a report) look up and play back a specific call without needing SSH access to the filesystem directly — this is the interface most staff will actually use day to day.
Step 4: Size Disk for Recording Growth
Estimate: (average call minutes per day) × (bytes per minute for your chosen format) × (retention days you plan to keep locally) gives a rough local storage requirement. Build in headroom — a busy month or an unexpected campaign volume spike can eat through slack much faster than a flat average estimate suggests.
Step 5: Identify Old Recordings for Archival
find /var/spool/asterisk/monitor -mtime +90 -name '*.wav' lists recordings older than 90 days — adjust the age threshold to match your actual retention policy. Run this as a dry-run listing first and confirm the count and total size look reasonable before ever pairing it with a delete step.
Step 6: Automate Offsite Archival
Rather than deleting old recordings outright, archive them to cheaper offsite/cold storage first — our rclone offsite backup script works directly for this: point it at the recordings directory and a cloud remote, and schedule it to run before your retention cleanup step so nothing is lost permanently just because it aged off local disk.
Step 7: Set a Compliance-Driven Retention Policy
How long you must (or may) keep call recordings varies significantly by jurisdiction and industry — some regulations mandate a minimum retention period, others mandate a maximum before deletion is required. Set your local-delete and archive-delete thresholds based on actual legal requirements for your specific business, not an arbitrary convenient number, and document the policy so it survives staff turnover.
Step 8: Restore an Archived Recording on Demand
When a specific archived recording is needed (a dispute, an audit request), pull it back from cold storage with rclone copy remote:call-archive/FILENAME.wav /var/spool/asterisk/monitor/restored/ and confirm it plays correctly before handing it over. Test this restore path at least once before you actually need it under time pressure — an archive nobody has ever successfully restored from is not a reliable archive.
Quick reference
# Check current usage
du -sh /var/spool/asterisk/monitor/

# List (dry-run) recordings older than 90 days
find /var/spool/asterisk/monitor -mtime +90 -name '*.wav'

# Archive then clean up (after confirming archive succeeded)
./rclone-offsite-backup.sh
find /var/spool/asterisk/monitor -mtime +90 -delete
Related tutorials
Image credits: All illustrations are original terminal/config mockups created for
Gnome IT Solutions — not screenshots from any third-party site. Tutorial text © Gnome IT Solutions.