Learn how to create an LXC container in Proxmox using the official web interface wizard. Containers are lightweight and ideal for web servers, DNS, and monitoring.
Prerequisites
- Proxmox VE running on port 8006
- LXC template downloaded (e.g. ubuntu-22.04-standard)
- Storage space and vmbr0 network bridge
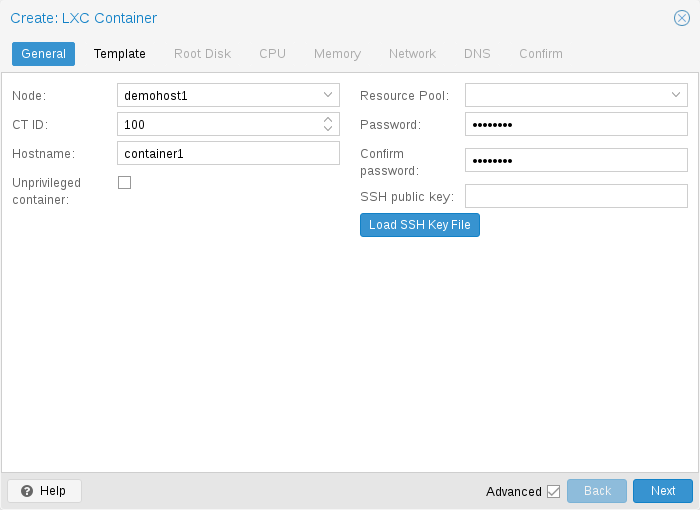
Step 1: Open Create CT Wizard — General Tab
Select your node, click Create CT. Set CT ID, hostname, and root password.
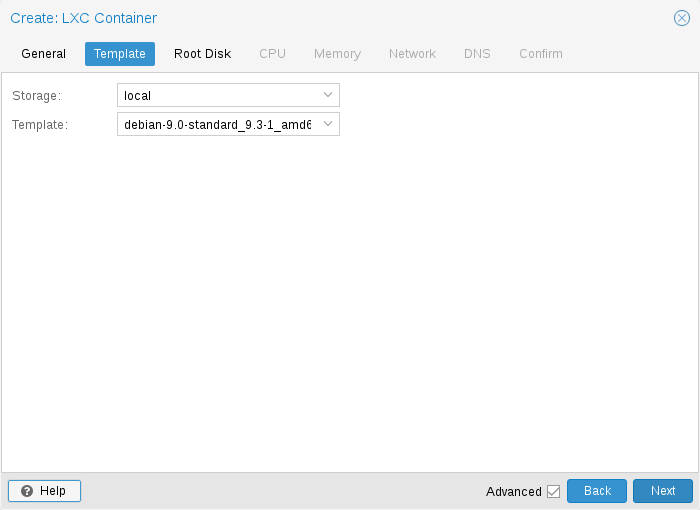
Step 2: Select OS Template
On the Template tab, choose storage and template (e.g. ubuntu-22.04-standard).
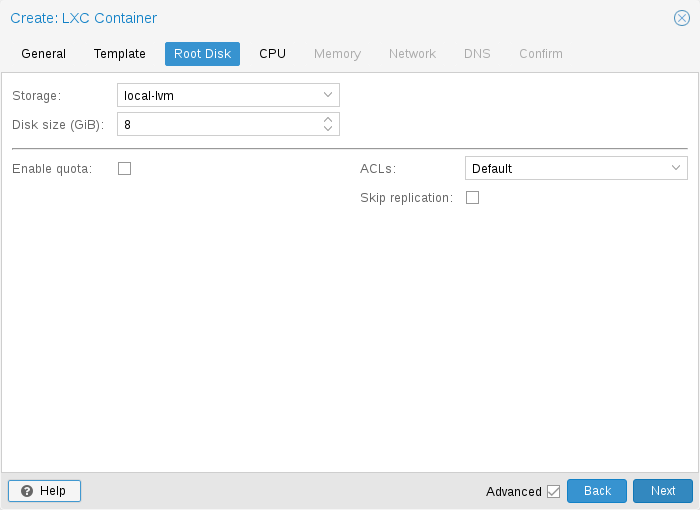
Step 3: Configure Root Disk
Set root disk size and storage pool on the Disks tab.
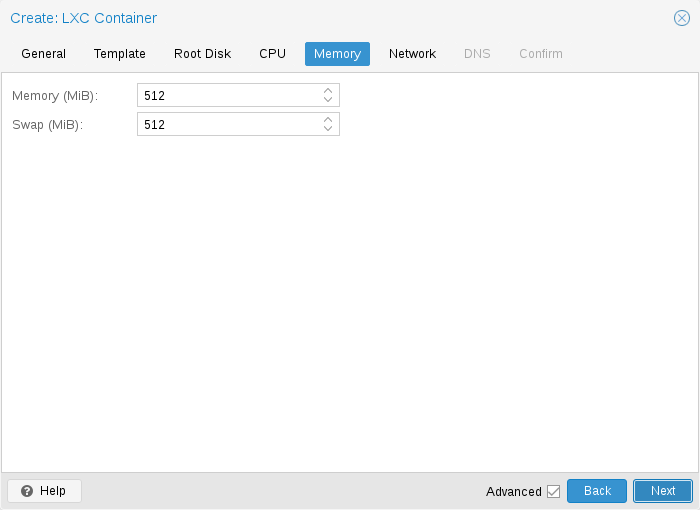
Step 4: Set CPU and Memory
Assign CPU cores and memory for the container.
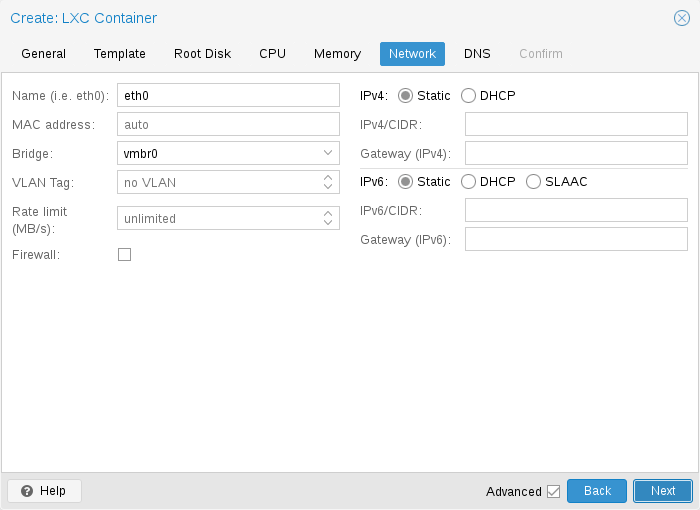
Step 5: Configure Network
Attach to bridge vmbr0, set IPv4 (DHCP or static).
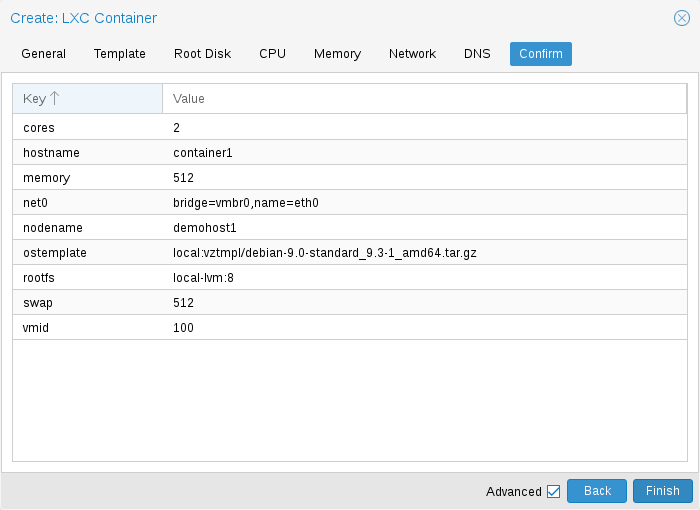
Step 6: Confirm and Create
Review settings on the Confirm tab and click Finish.
Verify Container
pct list
pct start 201
pct enter 201
Conclusion
You can now create LXC containers in Proxmox for fast, lightweight deployments alongside your VMs.
Image credits: Screenshots are from the official
Proxmox VE documentation
(Proxmox GmbH), used for educational purposes.