
Our cloud-init template guide built a
template by hand — install the OS, configure cloud-init, convert to template. That’s fine once, but doing
it again every time you need a patched base image, or want an identical process across environments,
doesn’t scale. Packer automates the entire template-build process as code: run one
command, get a fresh, consistent golden template every time.
This guide writes a Packer template that builds a Debian-based golden image on Proxmox — automated OS ”
“install, cloud-init and QEMU Guest Agent provisioning, and conversion to a template ready for our ”
f’Terraform provisioning guide to clone from.
Step 1: Why Packer Instead of Manual Template Builds
A manually built template captures whatever state existed the moment you clicked “convert to template” — if you need to patch it, you’re back in the GUI repeating steps by hand, with no record of exactly what was done. A Packer template (an HCL file) captures the entire build process as code: run packer build today or in six months and get the same result, version-controlled and reviewable like any other config.

Step 2: Install Packer and the Proxmox Plugin
Install Packer on your workstation (same machine running Terraform is fine — download from HashiCorp’s releases or your package manager). Initialize the Proxmox plugin in your project directory: packer init . after declaring the hashicorp/proxmox plugin source in your HCL file’s required_plugins block.
Step 3: Define the proxmox-iso Source Block
The source "proxmox-iso" "debian12" block is where you define: the Proxmox API endpoint and credentials (reuse the API token pattern from our API tokens guide), which node to build on, the ISO to boot from, and the VM hardware spec (cores, memory, disk size, and — critically — VirtIO SCSI and network models, same reasoning as our VirtIO guide for performance).
Step 4: Automate the OS Install
Fully unattended installs need a preseed file (Debian) or autoinstall/cloud-init config (Ubuntu) served to the VM during boot — Packer’s http_directory setting serves this file over a temporary HTTP server the installer reaches during boot. Set boot commands that pass the right kernel parameters pointing at that preseed URL, so the installer runs with zero manual interaction.
Step 5: Add Provisioners for Cloud-Init and QEMU Guest Agent
After the OS installs, Packer’s provisioner "shell" block runs commands inside the VM over SSH: install cloud-init and qemu-guest-agent, clean apt caches, remove machine-specific identifiers (SSH host keys, machine-id) so clones don’t inherit them, and truncate log files — all the same cleanup steps from manual template building, now scripted and repeatable.
Step 6: Run the Build
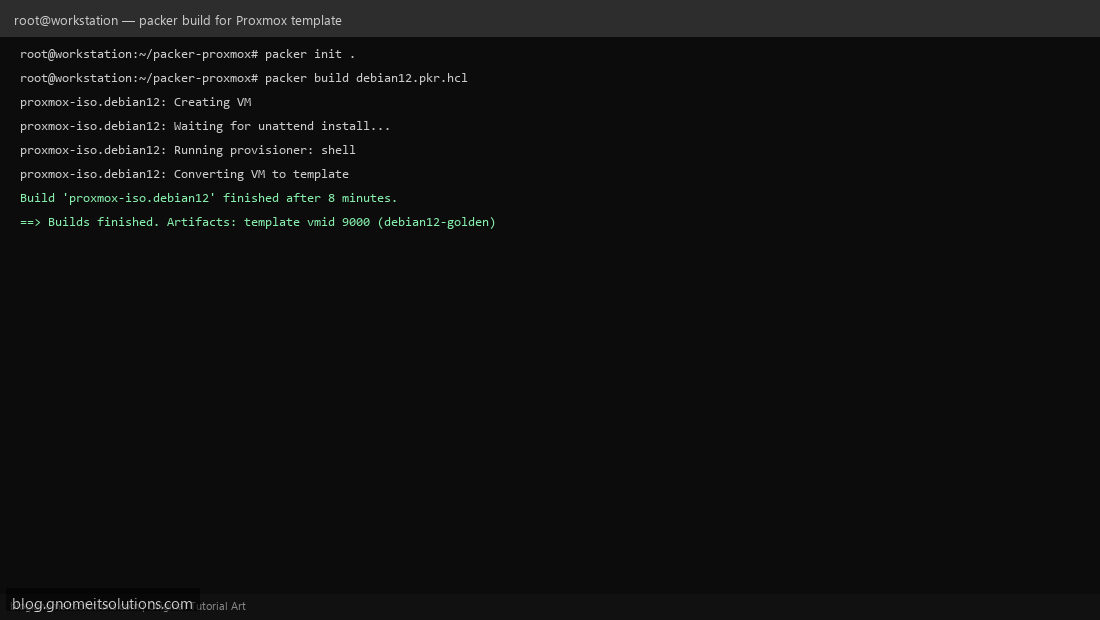
packer build debian12.pkr.hcl — Packer creates a temporary VM, boots the unattended install, runs your provisioners over SSH once it’s reachable, then converts the finished VM into a Proxmox template automatically and deletes the temporary VM. Watch the output for each named stage; a failure at the provisioner step usually means SSH wasn’t ready yet or a package name is wrong for the base image.
Step 7: Use the Resulting Template With Terraform
The template ID Packer produces (e.g. 9000, named debian12-golden) is exactly what our Terraform guide‘s clone.vm_id setting expects. This closes the full IaC loop: Packer builds and versions the base image, Terraform clones it into running VMs — neither tool doing the other’s job.
Step 8: Version and Retire Templates
Don’t overwrite your only golden template in place — name new builds with a date or version suffix (debian12-golden-2026-09), update Terraform configs to point at the new template ID once validated, and only then decommission the previous one. This gives you a rollback path if a newly patched template turns out to have a problem that only shows up once real VMs are cloned from it.
Example debian12.pkr.hcl skeleton
packer {
  required_plugins {
    proxmox = {
      source  = "github.com/hashicorp/proxmox"
      version = "~> 1"
    }
  }
}

source "proxmox-iso" "debian12" {
  proxmox_url = "https://pve1:8006/api2/json"
  node        = "pve1"
  iso_file    = "local:iso/debian-12-netinst.iso"

  cores    = 2
  memory   = 2048
  scsi_controller = "virtio-scsi-single"

  http_directory = "http"
  boot_command   = ["<esc><wait>", "install auto=true priority=critical url=http://{{ .HTTPIP }}:{{ .HTTPPort }}/preseed.cfg<enter>"]

  ssh_username = "root"
  ssh_timeout  = "20m"

  template_name        = "debian12-golden"
  unmount_iso          = true
}

build {
  sources = ["source.proxmox-iso.debian12"]
  provisioner "shell" {
    inline = [
      "apt-get update && apt-get install -y cloud-init qemu-guest-agent",
      "rm -f /etc/ssh/ssh_host_*",
      "truncate -s 0 /etc/machine-id"
    ]
  }
}
Related tutorials
Image credits: All illustrations use original Proxmox VE branded artwork created
for Gnome IT Solutions — not copied from vendor marketing assets or third-party screenshots.
Tutorial text © Gnome IT Solutions.
Image credits: Screenshots are from the official
Proxmox VE documentation
(Proxmox GmbH), used under open documentation terms for educational purposes.
Tutorial text and layout © Gnome IT Solutions.