Our Proxmox HA cluster guide covered NFS as shared storage
for VM failover — the simplest option, but it depends on a separate NAS box. Ceph turns your
existing Proxmox nodes into the storage layer itself: each node contributes local disks to a distributed,
replicated storage pool, and any node can serve any VM’s data. This is a hyper-converged
setup — no external SAN or NFS server required.
This guide installs Ceph across a 3-node Proxmox cluster, creates monitors, managers, and OSDs, builds a
replicated RBD pool, and connects it as HA-ready shared storage.
Why Ceph instead of NFS
- No single point of failure — NFS depends on one NAS; Ceph replicates across nodes
- Scales with your cluster — add a node, add its disks as OSDs, capacity grows
- Native RBD integration — Proxmox talks to Ceph directly, no NFS mount layer
- Trade-off: needs 3+ nodes, fast networking (10 GbE recommended), and more RAM/CPU overhead
than NFS for the same VM count
Step 1: Plan Disks and Networking Before You Start
Ceph needs dedicated raw disks for OSDs — not the disk hosting Proxmox itself. Each of your 3+ nodes should have at least one unused SSD/NVMe disk. Ceph is network-sensitive: use a dedicated 10 GbE (or faster) link for Ceph traffic, separate from your management and corosync networks if possible. Plan a private subnet (e.g. 10.0.0.0/24) just for Ceph’s public and cluster traffic.
Step 2: Install Ceph Packages on Every Node
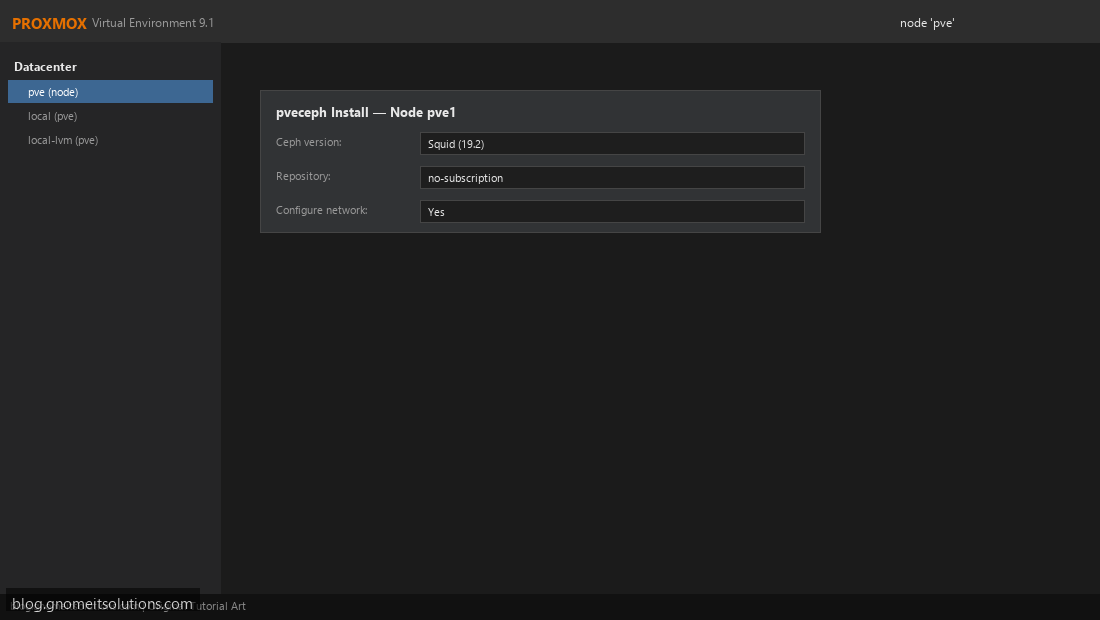
On each node in the cluster (via GUI: node → Ceph → Install Ceph, or CLI): pveceph install --repository no-subscription. This installs Ceph binaries and registers the node with Proxmox’s Ceph management layer. Repeat identically on pve1, pve2, and pve3 — mismatched Ceph versions across nodes cause cluster health warnings.
Step 3: Initialize the Ceph Cluster Network
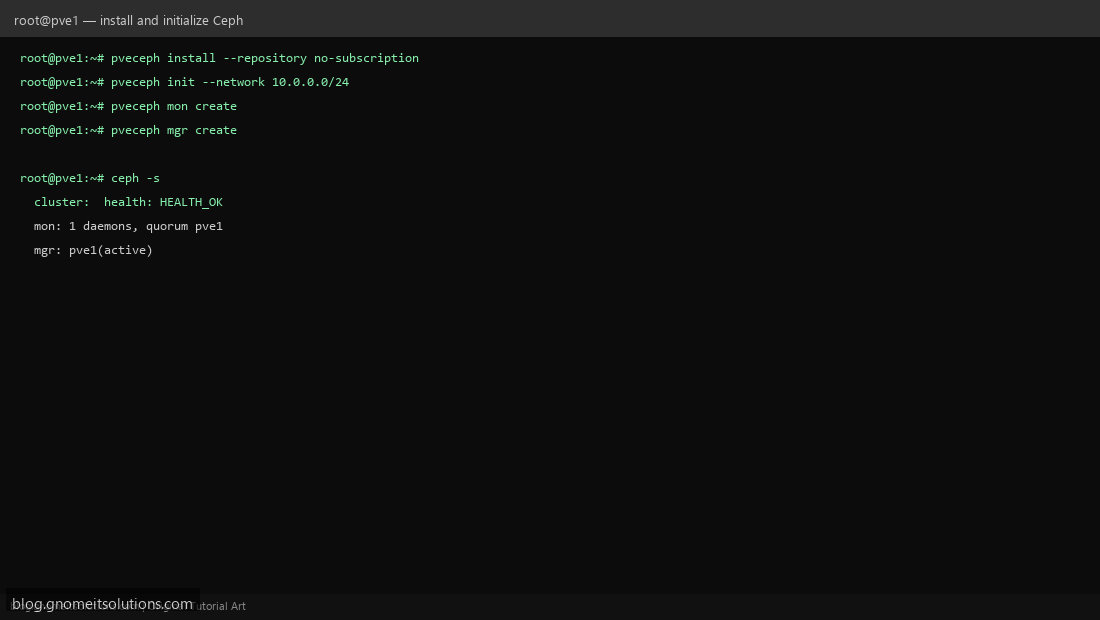
On the first node only: pveceph init --network 10.0.0.0/24 to set the Ceph public network. Then create the first monitor and manager: pveceph mon create and pveceph mgr create. Confirm with ceph -s — you should see HEALTH_OK with 1 monitor and 1 manager before continuing.
Step 4: Add Monitors and Managers on Remaining Nodes
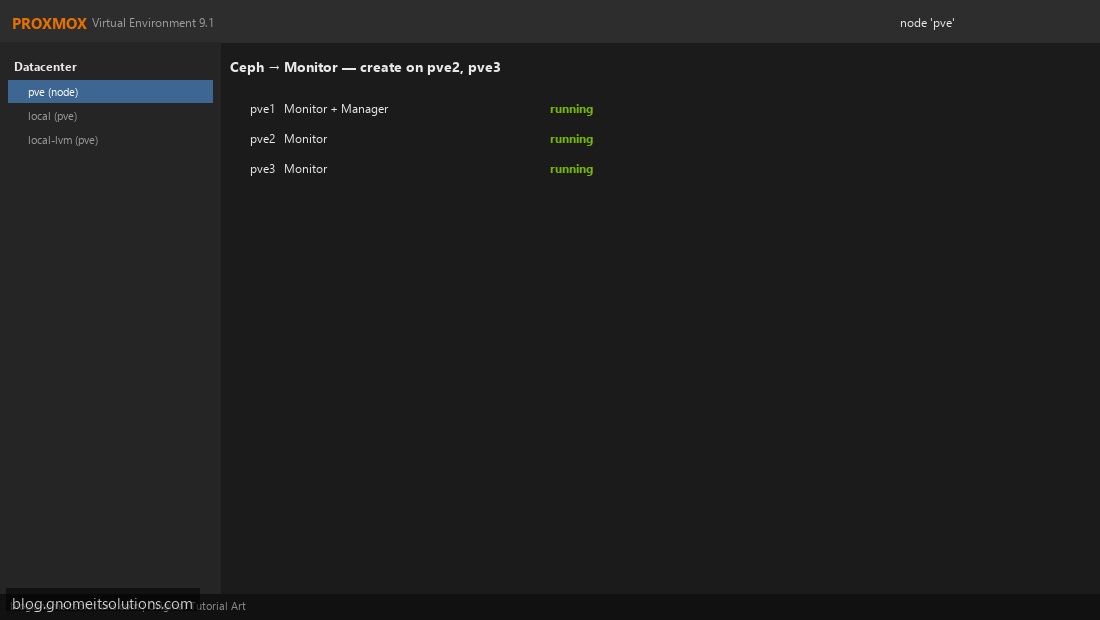
Ceph → Monitor → Create on pve2 and pve3 to reach an odd number of monitors (3 is standard for a 3-node cluster) — this gives Ceph its own quorum, separate from Proxmox’s corosync quorum. Add a standby manager on a second node too, so management continues if the active manager’s node goes down.
Step 5: Create OSDs from Local Disks
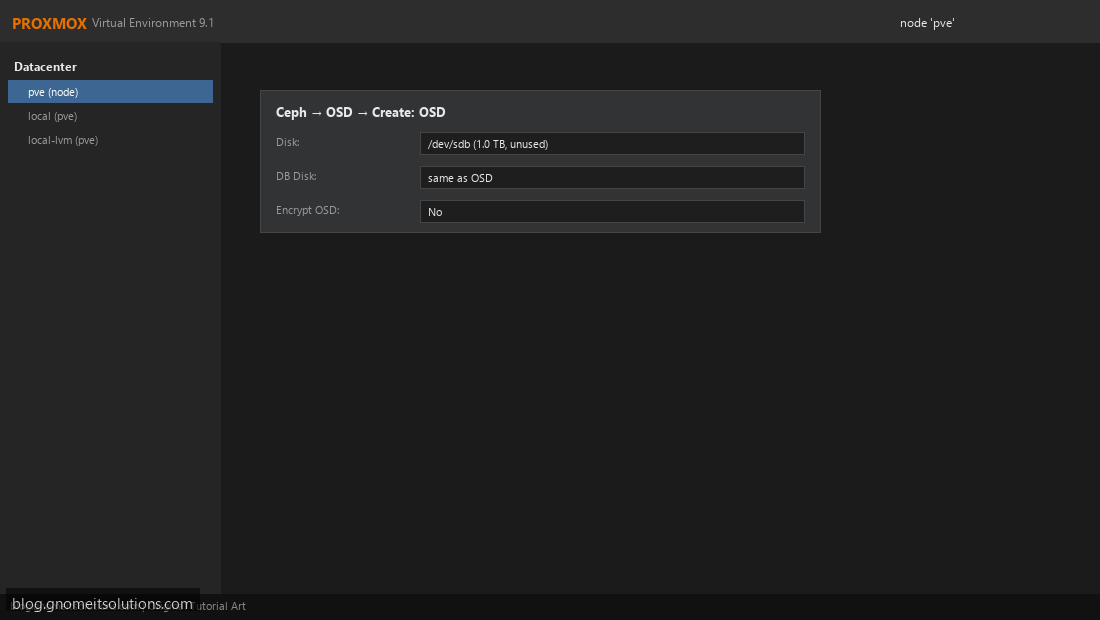
Ceph → OSD → Create: OSD on each node. Select the unused raw disk (e.g. /dev/sdb) — Ceph will wipe it, so double-check you’re not selecting the boot disk. Repeat for every disk you’re contributing on every node. More OSDs spread across more nodes gives Ceph better failure tolerance and more parallel I/O.
Step 6: Create a Replicated Pool
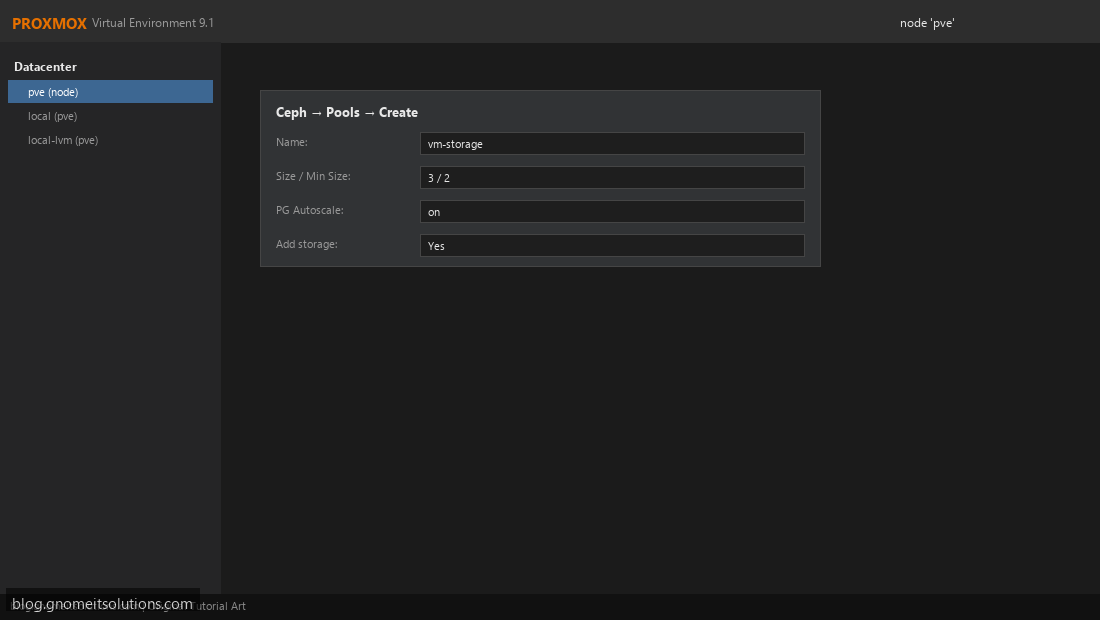
Ceph → Pools → Create: name it vm-storage, set size 3 / min_size 2 (each object is stored on 3 OSDs across 3 nodes; the pool stays writable if only 1 node is down). Enable PG autoscale so Ceph tunes placement groups automatically as usage grows. Check Add storage so Proxmox registers the pool right away.
Step 7: Verify the RBD Storage Is Available Cluster-Wide
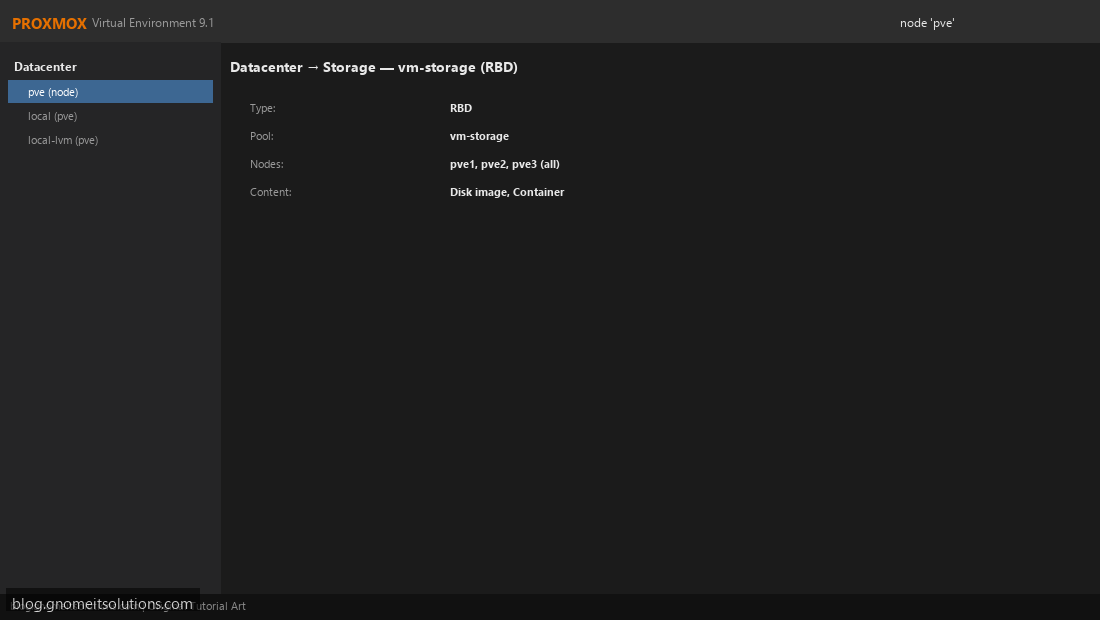
Datacenter → Storage should now list vm-storage as type RBD, available on all nodes, with content types Disk image and Container. Create a test VM with its disk on vm-storage and confirm it appears identically from every node — that’s what makes live migration and HA failover possible without shared NFS.
Step 8: Confirm Cluster Health and Add HA Resources
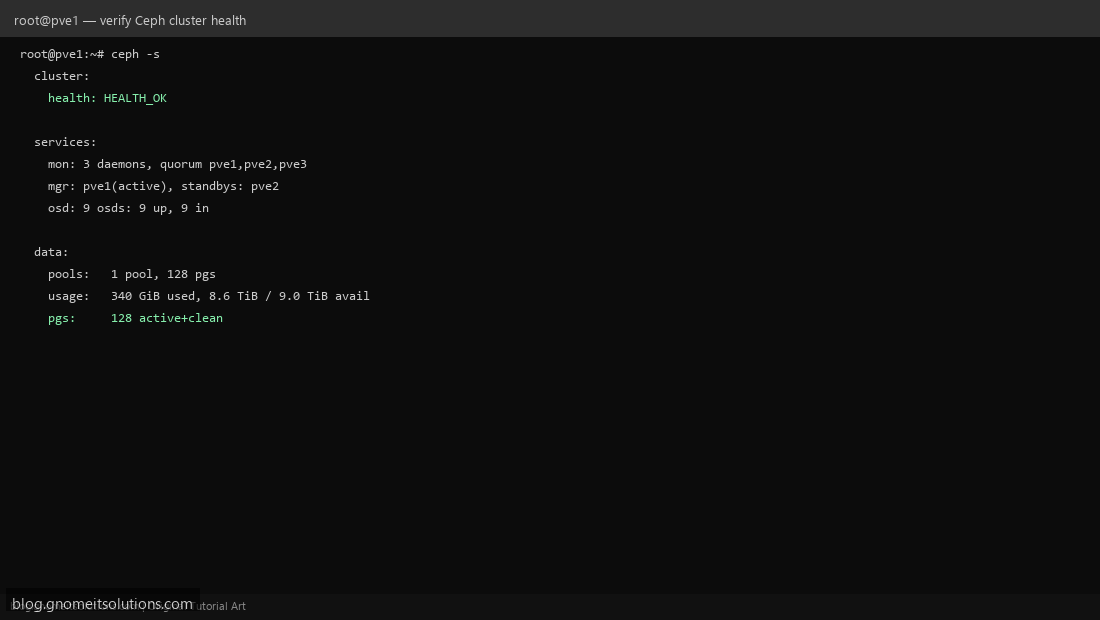
Run ceph -s and confirm HEALTH_OK, all OSDs up and in, and placement groups active+clean. Once healthy, follow the HA cluster guide to add VMs on this pool as HA resources — Ceph now satisfies the shared-storage requirement HA needs.
CLI reference
# Install and init (per node / first node)
pveceph install --repository no-subscription
pveceph init --network 10.0.0.0/24

# Monitors and managers
pveceph mon create
pveceph mgr create

# OSD from raw disk
pveceph osd create /dev/sdb

# Pool
pveceph pool create vm-storage --size 3 --min_size 2 --add_storages 1

# Health check
ceph -s
ceph osd tree
Sizing guidance
- Minimum: 3 nodes, 1 OSD disk each — survives 1 node failure
- Recommended: 3–5 nodes, 2+ OSD disks each, dedicated 10 GbE Ceph network
- RAM: budget roughly 1 GB per OSD daemon on top of normal Proxmox/VM usage
- Avoid consumer SSDs without power-loss protection — Ceph’s sync writes will bottleneck on them
Related tutorials
Image credits: All illustrations use original Proxmox VE branded artwork created
for Gnome IT Solutions — not copied from vendor marketing assets or third-party screenshots.
Tutorial text © Gnome IT Solutions.
Image credits: Screenshots are from the official
Proxmox VE documentation
(Proxmox GmbH), used under open documentation terms for educational purposes.
Tutorial text and layout © Gnome IT Solutions.