Our VM restore guide
covers bringing back one VM. A real disaster — dead hardware, a failed RAID controller, a
destroyed boot drive — takes out the entire node, and recovering from that is a different,
higher-stakes exercise: reinstalling the hypervisor itself, rejoining (or replacing its place in) the
cluster, and restoring every VM that lived there, ideally in a defined order with minimal guesswork under
pressure.
This is a runbook — write your own version of this with your actual node names, storage
IDs, and VM list filled in, and keep it somewhere reachable even if your primary infrastructure is down.
Step 1: Define the Scenario This Runbook Covers
This runbook assumes: the physical node is unrecoverable (dead motherboard, destroyed boot disk, whatever the cause), your VM data was backed up to Proxmox Backup Server on separate hardware (the entire premise falls apart if PBS lived on the same dead box — see our 3-2-1-1-0 backup rule guide), and you have replacement hardware (or a spare) ready to receive a fresh Proxmox install.
Step 2: What Should Already Be True Before Disaster Strikes
A runbook only works if the groundwork was done beforehand: PBS genuinely lives on separate physical infrastructure, you have a record of the failed node’s exact config (network settings, storage IDs, VM IDs and their assigned resources — screenshots or a simple text file checked into version control both work), and PBS encryption keys (if used — see our encryption guide) are stored somewhere reachable independent of the dead node.
Step 3: Reinstall Proxmox VE on Replacement Hardware
Follow our Proxmox install guide on the replacement box. Use the same hostname as the failed node if you’re rejoining it into an existing cluster in the same role — this avoids extra cluster reconfiguration and matches any hostname-based references in your other config.
Step 4: Rejoin the Cluster (or Note It Was Standalone)
If this node was part of a cluster, the surviving nodes still hold cluster state — remove the old (dead) node’s stale entry first (pvecm delnode OLDNAME from a surviving node), then join the freshly installed replacement normally via Datacenter → Cluster → Join. If it was a standalone node, this step is simply skipped — proceed straight to reconnecting storage.
Step 5: Reconnect to the PBS Datastore
Datacenter → Storage → Add → Proxmox Backup Server, using the same PBS server address, datastore name, and credentials the original node used. If backups were encrypted, register the encryption key you protected in Step 2 — without it, the backups on PBS are visible but not restorable.
Step 6: List and Bulk-Restore VMs
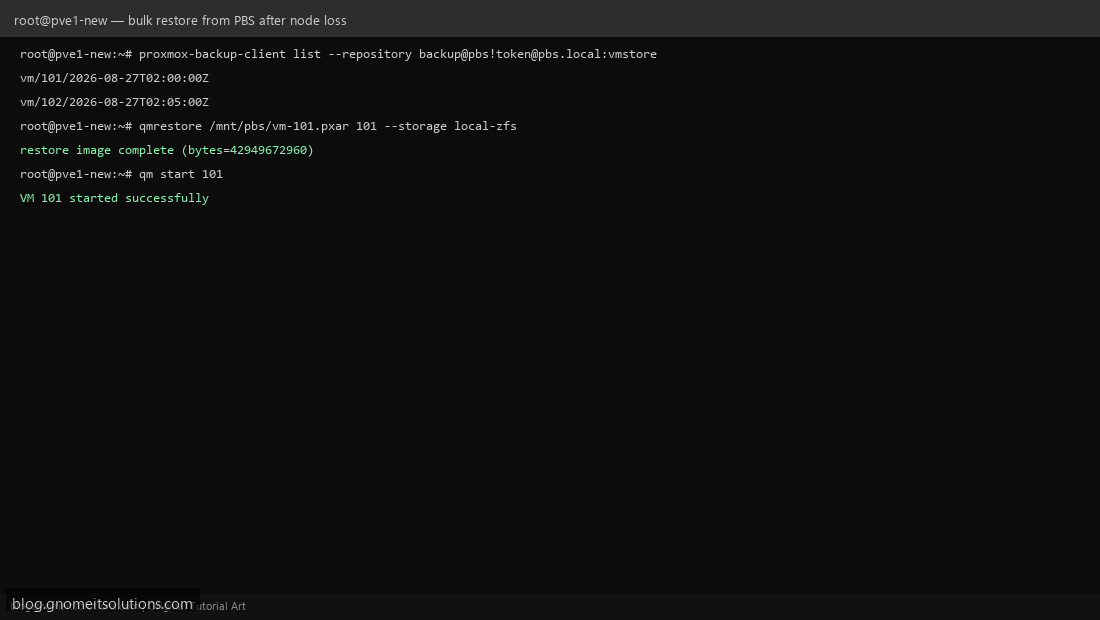
List every backup snapshot available for this node’s VMs: proxmox-backup-client list --repository backup@[email protected]:vmstore. Restore each one in priority order — critical production VMs first, less urgent ones after — with qmrestore or through the GUI’s PBS storage restore browser. Prioritizing matters: don’t restore 40 VMs in alphabetical order when 3 of them are what users are actually waiting on.
Step 7: Restore Networking and Storage Config to Match
A restored VM needs the node’s network bridges (vmbr0, any VLANs or SDN zones from our SDN guide) and storage IDs to match what the VM configs expect — a VM referencing local-zfs won’t start if the new node’s storage was named differently during reinstall. This is exactly the kind of detail your pre-disaster documentation from Step 2 should have captured.
Step 8: Post-Recovery Verification and RTO/RPO Review
Confirm every restored VM actually boots and its application responds correctly — not just that qm start succeeded. Then review the exercise itself: how long did full recovery actually take (your real RTO, recovery time objective) versus how old the restored data was (your real RPO, recovery point objective, driven by your backup schedule) — and whether both numbers are actually acceptable to the business, or whether backup frequency or automation needs to improve before the next real incident.
Runbook command reference
# Remove the dead node's stale cluster entry (run on a surviving node)
pvecm delnode OLDNODENAME

# List available backups on PBS
proxmox-backup-client list --repository backup@[email protected]:vmstore

# Restore a VM from PBS
qmrestore /mnt/pbs/vm-101.pxar 101 --storage local-zfs

# Start and verify
qm start 101
qm status 101
Practice this before you need it
A disaster recovery runbook that’s never been tested is a hypothesis, not a plan. Run this full process ”
“against a spare/test node at least once — the surprises (a forgotten storage ID, a missing encryption key ”
“backup) are far cheaper to discover during a drill than during an actual outage.
Related tutorials
- PBS Encryption, Pruning & Garbage Collection
- 3-2-1-1-0 Backup Rule for Proxmox
- Proxmox Cluster Setup: Multi-Node Configuration
Image credits: All illustrations use original Proxmox VE branded artwork created
for Gnome IT Solutions — not copied from vendor marketing assets or third-party screenshots.
Tutorial text © Gnome IT Solutions.
Image credits: Screenshots are from the official
Proxmox VE documentation
(Proxmox GmbH), used under open documentation terms for educational purposes.
Tutorial text and layout © Gnome IT Solutions.