GPU passthrough on Proxmox VE gives a VM direct access to a physical graphics card —
essential for AI/ML training, CAD workstations, video transcode, and gaming VMs. Proxmox uses KVM +
VFIO to bind the GPU away from the host and attach it via hostpci.
This complete guide covers Intel and AMD hosts, NVIDIA and AMD consumer cards, Windows and Linux guests,
and the fixes for the most common failure modes (Code 43, black screen, IOMMU group conflicts).
Requirements
- CPU and motherboard with Intel VT-d or AMD-Vi enabled in BIOS
- GPU in an isolated IOMMU group (or ACS patch as last resort — document security tradeoff)
- Second GPU, integrated graphics, or headless host access (IPMI) for Proxmox host console
- For NVIDIA: often need vGPU workaround flags or proper ROM/bar settings for consumer cards
- Guest VM: OVMF (UEFI) + Q35 machine type recommended for Windows
Note: An older short guide exists at
/proxmox-pci-passthrough/ — this is the full walkthrough.
Step 1: Enable IOMMU in BIOS and GRUB
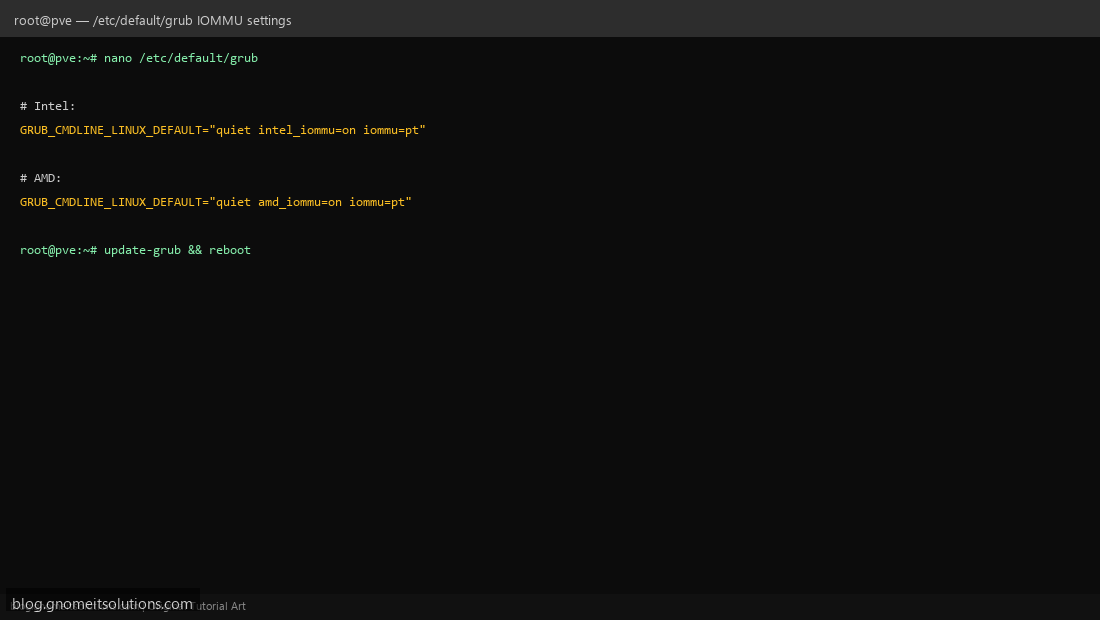
In BIOS enable SVM/IOMMU (AMD) or VT-d (Intel). On the Proxmox host edit /etc/default/grub: add intel_iommu=on iommu=pt or amd_iommu=on iommu=pt to GRUB_CMDLINE_LINUX_DEFAULT. Run update-grub and reboot. The iommu=pt option improves performance for passthrough workloads.
Step 2: Verify IOMMU Groups
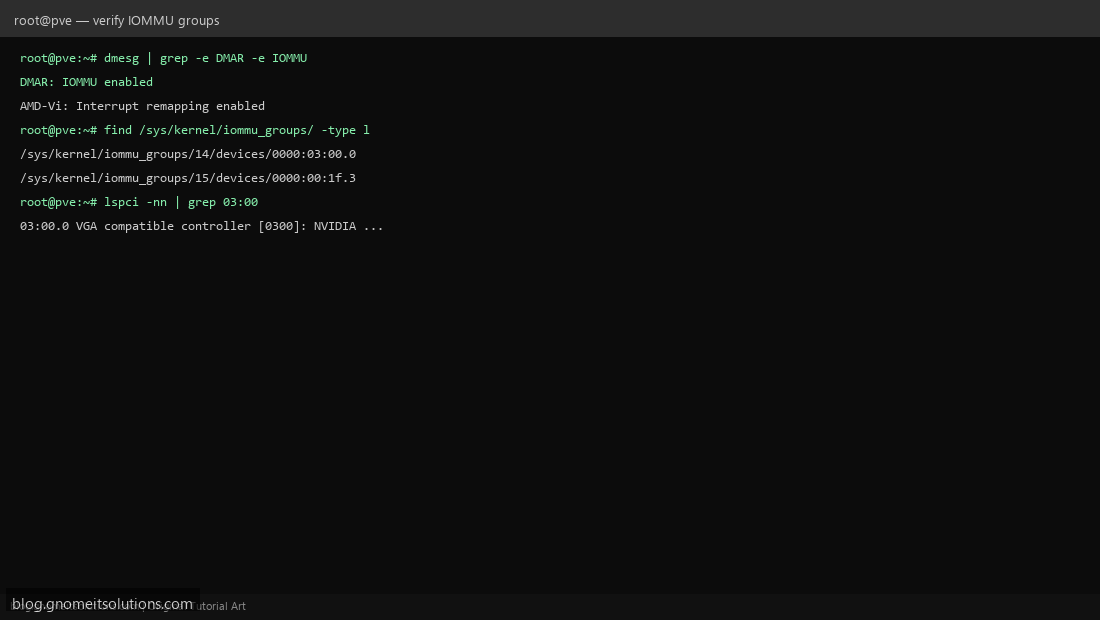
After reboot, confirm IOMMU is active and identify your GPU PCI address: dmesg | grep -e DMAR -e IOMMU and find /sys/kernel/iommu_groups/ -type l | sort. The GPU (and ideally its audio function at 03:00.1) should be alone in its group. If grouped with unrelated devices, try a different PCIe slot or motherboard with ACS support.
Step 3: Bind GPU to vfio-pci
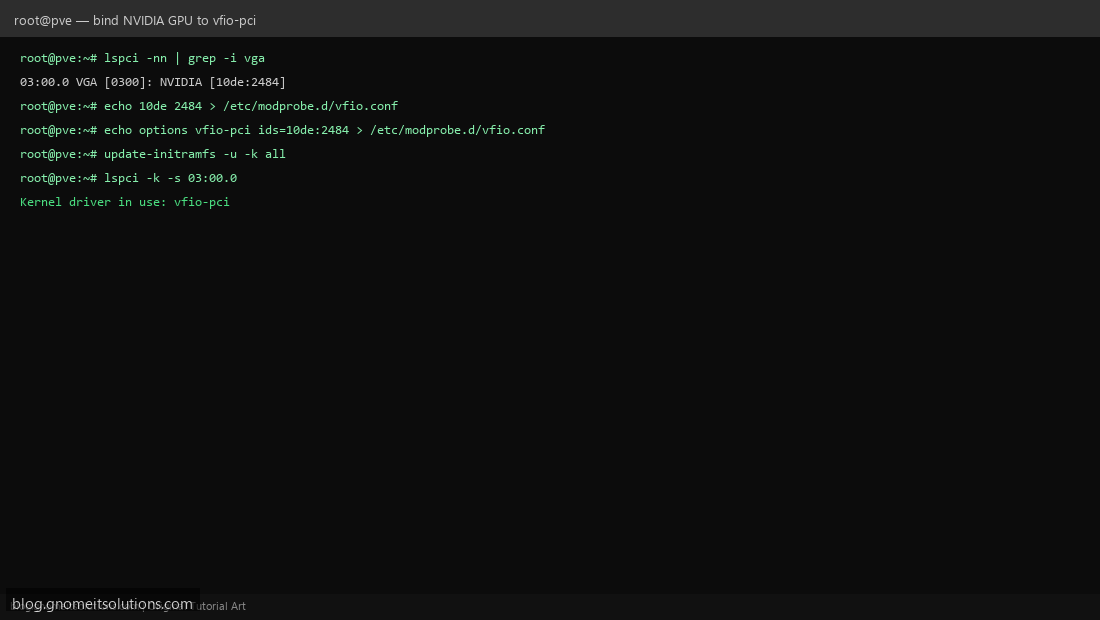
Blacklist the host driver (nouveau, nvidia, amdgpu for the passthrough card). Add VFIO IDs to /etc/modprobe.d/vfio.conf using lspci -nn vendor:device IDs. Run update-initramfs -u and reboot. Confirm lspci -k -s 03:00.0 shows vfio-pci in use.
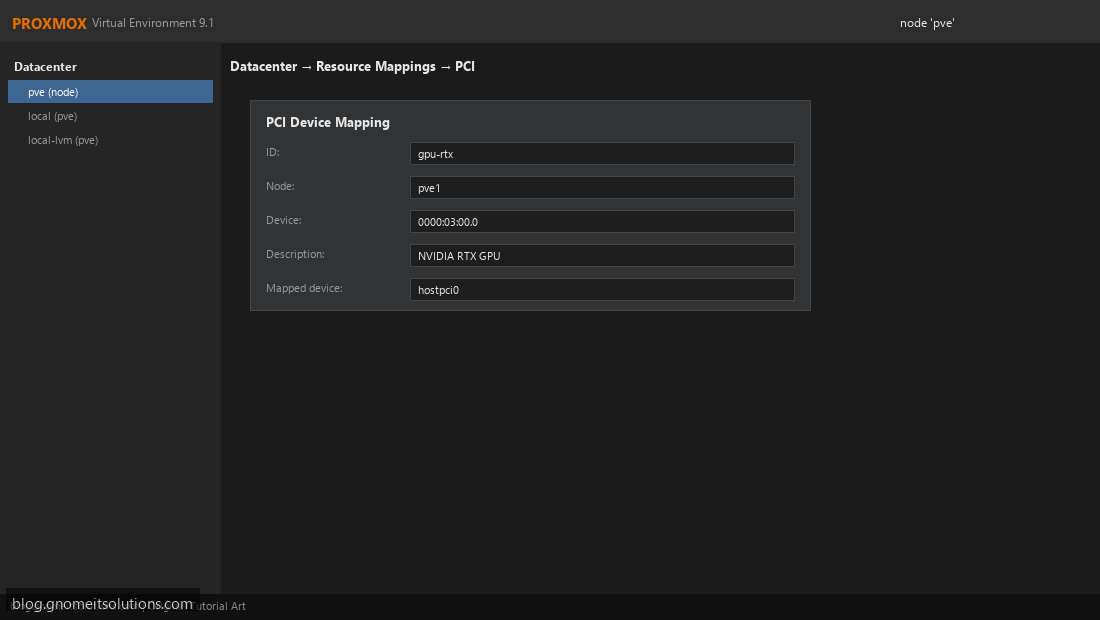
Step 4: Create PCI Device Mapping (Cluster-Wide)
Datacenter → Permissions → Resource Mappings → PCI Device → Add. Map the GPU by PCI address (e.g. 0000:03:00.0) with ID gpu-rtx. Mappings make the device selectable in the VM hardware UI and enforce consistent naming across nodes.
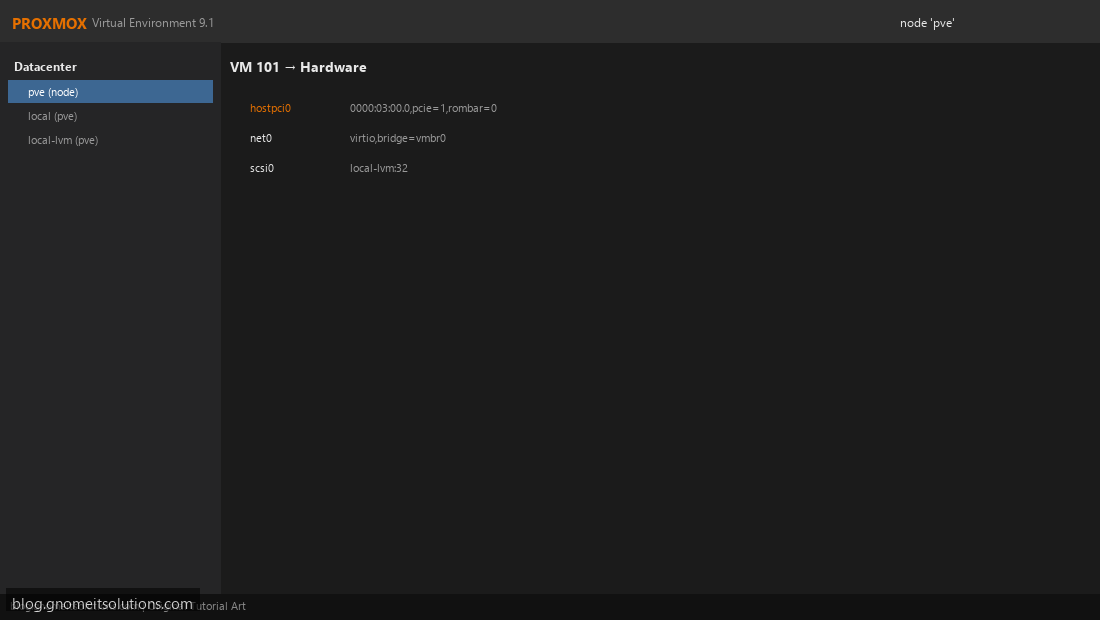
Step 5: Configure the VM — OVMF, Q35, hostpci
Create VM with OVMF (UEFI) BIOS and q35 machine type. Add PCI Device → select mapped GPU. Enable PCIe, set ROM-Bar off if boot hangs (common NVIDIA fix), enable Primary GPU for Windows display. CPU type host improves performance. Disable guest CPU flags that conflict with migration if this VM is stationary.
Step 6: Install Guest Drivers (Windows / Linux)
Windows: Install VirtIO drivers ISO first (network/disk), then NVIDIA/AMD driver from vendor site. If Device Manager shows Code 43, add args: -cpu host,hv_vendor_id=proxmox or hide KVM hypervisor flag per Proxmox wiki.
Linux: Install nvidia-driver or use distro ROCm stack for AMD. Blacklist nouveau in guest if needed.
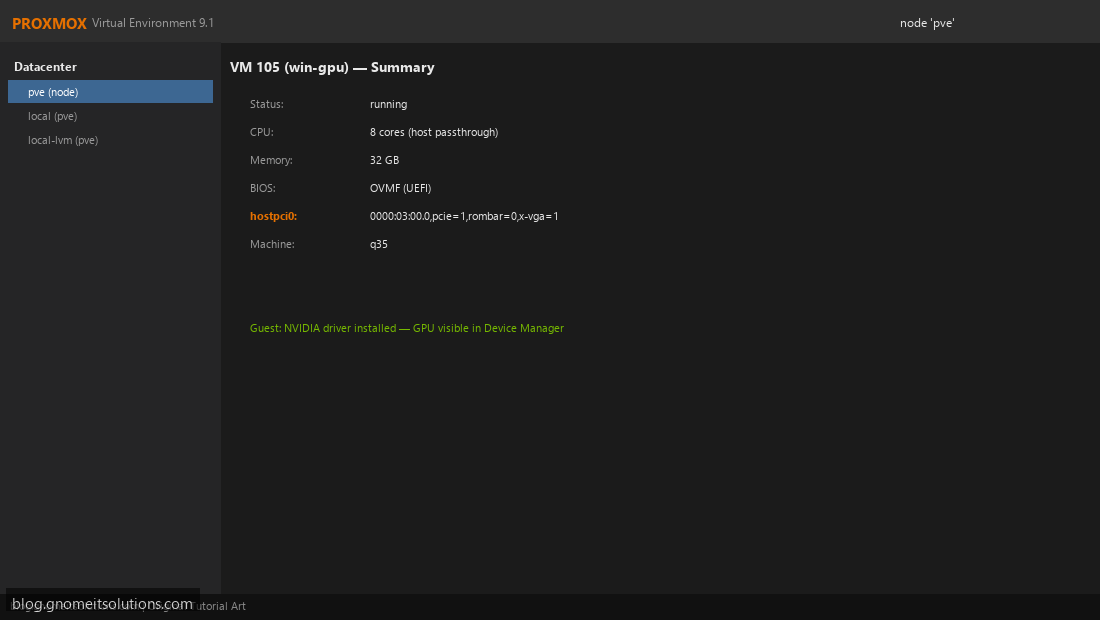
Step 7: Validate and Monitor
Windows: Device Manager → Display adapters shows GPU without warning icon; run GPU-Z or nvidia-smi in Linux guest. On host, confirm GPU does not revert to nouveau after updates — pin Proxmox kernel or re-run initramfs if needed. Snapshot the working VM before driver upgrades.
Complete config snippet
# /etc/default/grub (Intel example)
GRUB_CMDLINE_LINUX_DEFAULT="quiet intel_iommu=on iommu=pt"

# /etc/modprobe.d/vfio.conf
options vfio-pci ids=10de:2484,10de:228b
blacklist nouveau
blacklist nvidia

# VM config (qm set)
qm set 105 --bios ovmf --machine q35 --cpu host
qm set 105 --hostpci0 0000:03:00.0,pcie=1,rombar=0,x-vga=1

# Windows Code 43 workaround (if needed)
qm set 105 --args "-cpu host,hv_vendor_id=proxmox"
Troubleshooting
| Symptom | Fix |
|---|---|
| Black screen at VM boot | rombar=0, ensure OVMF, try SeaBIOS for legacy GPUs |
| Code 43 (NVIDIA Windows) | hv_vendor_id workaround, hide KVM features |
| GPU still used by host driver | Verify vfio-pci binding, update-initramfs, blacklist |
| IOMMU group not isolated | Different slot, ACS-capable board, or wiki ACS override |
| Host loses console | Use IPMI or separate management GPU — never pass only iGPU without headless plan |
Related tutorials
Image credits: All illustrations use original Proxmox VE branded artwork created
for Gnome IT Solutions — not copied from vendor marketing assets or third-party screenshots.
Tutorial text © Gnome IT Solutions.
Image credits: Screenshots are from the official
Proxmox VE documentation
(Proxmox GmbH), used under open documentation terms for educational purposes.
Tutorial text and layout © Gnome IT Solutions.