The Proxmox web UI is the single most powerful control surface in your infrastructure — anyone who logs
in as an admin can start, stop, delete, or clone any VM in the cluster. A password alone is a thin barrier
for that level of access, especially for an account reachable from the internet or shared among an ops
team. Proxmox supports TOTP (time-based one-time passwords, the same standard behind Google
Authenticator, Authy, and most password managers’ built-in authenticator features) as a second factor.
This guide enables TOTP for your own account, walks through the recovery-key safety net, and covers
enforcing it for every admin account rather than leaving it optional.
Step 1: Understand Proxmox’s TFA Options
Proxmox supports several second-factor types: TOTP (app-based codes, works offline, no extra hardware), WebAuthn (hardware security keys like YubiKey, or platform authenticators like Windows Hello/Touch ID), and recovery keys (one-time backup codes for when your primary method is unavailable). TOTP is the easiest starting point since it needs no extra hardware — any phone with an authenticator app works.
Step 2: Enable TOTP for Your Own User
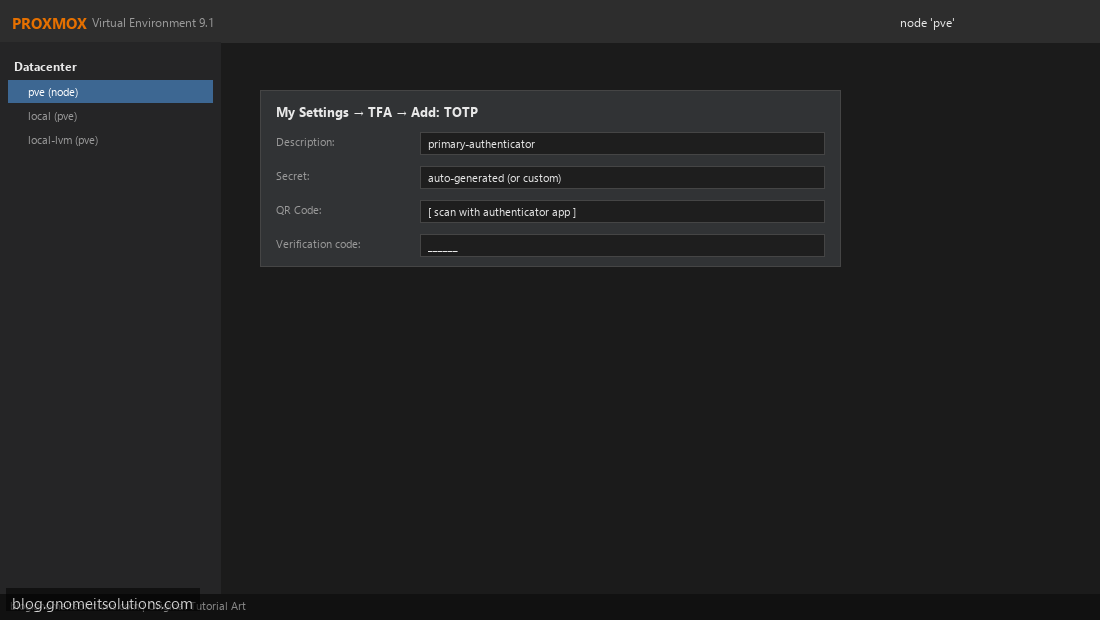
Click your username (top right) → My Settings → TFA tab → Add → TOTP. Give it a description (e.g. primary-phone) — useful once you have multiple methods registered and need to tell them apart later.
Step 3: Scan the QR Code and Verify
Proxmox displays a QR code and the raw secret as a fallback. Scan it with your authenticator app (Google Authenticator, Authy, 1Password, Bitwarden, etc.), then enter the 6-digit code the app generates into the verification code field to confirm the setup actually works before it’s enforced — this step catches a mistyped secret or wrong-app scan before you’ve locked yourself into it.
Step 4: Save Recovery Keys Immediately
Before closing the TFA setup dialog, Proxmox offers to generate a set of single-use recovery keys. Generate them and store them somewhere durable and separate from your normal password manager — a locked physical safe or a separate offline vault, not a note on the same phone running your authenticator app. These are what save you if your phone is lost, stolen, or wiped.
Step 5: Test the Full Login Flow
Log out completely and log back in. You should now be prompted for the TOTP code after your password, not instead of it — this confirms TFA is layered correctly rather than having accidentally replaced password auth. If login succeeds on the first real attempt, the setup is solid.
Step 6: Enforce TFA for the Whole Admin Group
Individual opt-in TFA only protects the accounts that bothered to set it up — the real security win is enforcement. Datacenter → Permissions → Two Factor → set a TFA requirement policy at the realm level (e.g. require it for the pve realm), so every account in that realm must configure a second factor before they can log in at all.
Step 7: Plan for Account Recovery
If someone loses both their device and their recovery keys, a full cluster admin (typically root@pam, which authenticates via the underlying Linux system and isn’t affected by pve-realm TFA policy) can reset that user’s TFA configuration from Datacenter → Permissions → Users. Document this recovery path for your team before someone actually needs it at 2 AM.
Rollout checklist
- Set up and test TOTP on your own account first before enforcing it on anyone else
- Generate and securely store recovery keys for every admin account, not just yours
- Document who holds
root@pamaccess for emergency TFA resets - Enforce at the realm level once everyone has successfully tested their own login
Related tutorials
- Proxmox User Permissions and Roles
- Proxmox Host Security Hardening Checklist
- Proxmox API Tokens and Automation
Image credits: All illustrations use original Proxmox VE branded artwork created
for Gnome IT Solutions — not copied from vendor marketing assets or third-party screenshots.
Tutorial text © Gnome IT Solutions.
Image credits: Screenshots are from the official
Proxmox VE documentation
(Proxmox GmbH), used under open documentation terms for educational purposes.
Tutorial text and layout © Gnome IT Solutions.