Outbound dialing gets most of the attention in ViciDial guides, but a support line or any business
taking calls needs the inbound side built correctly: a DID that routes into an optional IVR menu, then into
a queue that holds callers with music while an available agent is found. Get any link in
that chain wrong and callers either reach nothing, or reach the wrong queue with no one watching it.
This guide builds the full path from a phone number down to an agent’s headset: an Inbound Group, its
queue/hold behavior, a simple IVR menu routing between two groups, and a full end-to-end test.
Step 1: Understand the Inbound Architecture
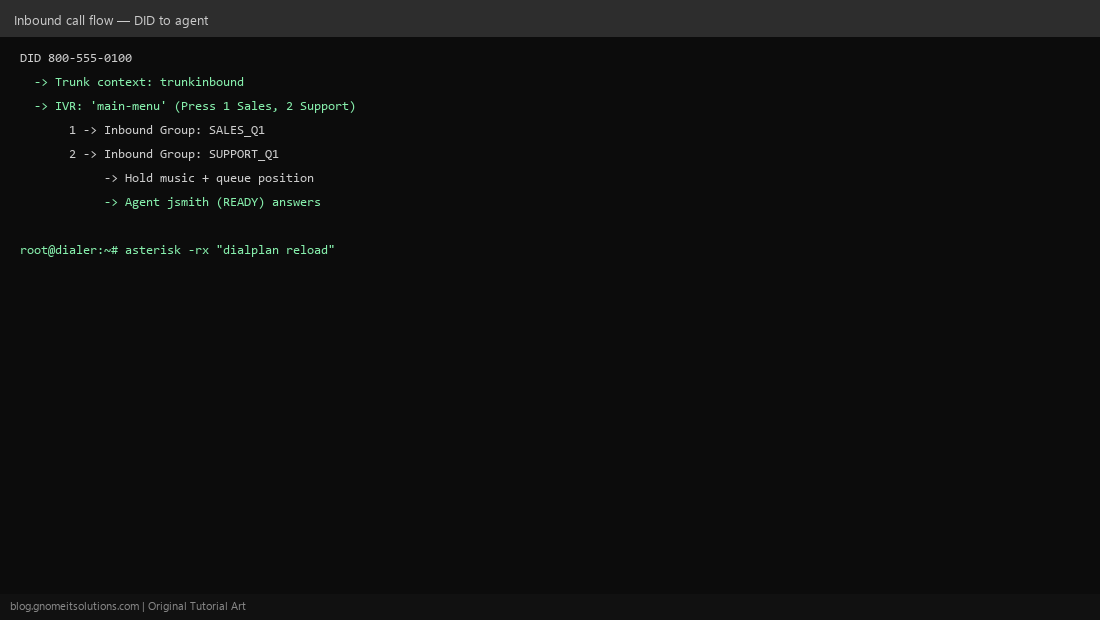
The call path is: DID (the phone number a customer dials) → your SIP trunk’s context in extensions.conf (see our dialplan context error guide if this step is broken) → optionally an IVR menu for caller self-selection → an Inbound Group, which holds the caller in queue and offers them to available agents logged into that group.
Step 2: Create an Inbound Group
Admin → Inbound Groups → Add New Inbound Group. Give it an ID (e.g. SUPPORT_Q1) and a description. This is the container agents will log into and that calls will be queued against — nothing routes here yet until you connect the dialplan side in a later step.
Step 3: Configure Queue and Hold Settings
On the Inbound Group’s detail page, set hold music (a MOH class, or upload custom audio), max wait time before the call overflows somewhere else (voicemail, a different group, or a callback offer), and overflow behavior for what happens if every agent is busy past that threshold. Getting max-wait right matters for compliance in some industries — don’t leave it at an unrealistically long default.
Step 4: Assign Agents to the Inbound Group
Agents don’t automatically receive inbound calls just by existing — they need to log into a campaign or inbound group that’s tied to this Inbound Group ID, and their user profile needs permission for inbound campaigns. Confirm in Admin → Users that the relevant agents have inbound campaign access enabled, and that the campaign/group linkage on the Inbound Group page lists the right agents or campaign.
Step 5: Build a Simple IVR Menu
Admin → IVR / Phone Groups (naming varies slightly by ViciDial version) → Add. Record or upload a greeting (“Press 1 for Sales, 2 for Support”), and map each DTMF digit to a destination — most commonly another Inbound Group, but it can also point to a specific extension or voicemail. Keep the menu to 2-3 options for a first build; a deep nested menu is easy to get lost in during testing.
Step 6: Route the DID Into the IVR and Then Into the Group
Point your trunk’s inbound context at the IVR you just built (this is the dialplan connection point — the same [trunkinbound] context style covered in our context error guide). Confirm each IVR option’s destination Inbound Group ID matches exactly what you created in Step 2 — a typo here is the single most common reason a caller reaches the IVR menu fine but then hits dead air after pressing an option.
Step 7: Test the Full Call Flow End to End
Log an agent into the target Inbound Group so someone is actually available to answer, then place a real test call to the DID from an outside line (not an internal extension, which can skip parts of the real routing path). Confirm: the greeting plays, the DTMF option routes correctly, hold music plays if no agent is immediately free, and the call connects to the logged-in agent.
Step 8: Monitor and Tune
Once live, use the real-time inbound stats from our real-time reports guide to watch actual queue depth and wait times, and check the historical abandon rate after a few days of real traffic. If abandon rate is high, the max-wait/overflow setting from Step 3 is usually the first thing to revisit — either you need more agents on the group, or callers need an earlier off-ramp (callback option, voicemail) before they give up.
Quick checklist
- Trunk context routes into the correct IVR (or directly into the Inbound Group if no IVR is needed)
- Every IVR option’s destination Inbound Group ID matches exactly — check for typos
- At least one agent logged into the group before testing, or every test call will hit max-wait
- Test from an outside line, not an internal extension
Related tutorials
Image credits: All illustrations are original terminal/config mockups created for
Gnome IT Solutions — not screenshots from any third-party site. Tutorial text © Gnome IT Solutions.