
Our PBS setup guide got backups running — this guide covers
two things that matter once you’re actually relying on those backups long-term: encryption
(so a compromised PBS server alone can’t expose your VM data) and the prune/garbage-collection
pair (retention deletion doesn’t actually free disk space by itself — a common surprise for anyone
new to PBS’s chunk-based storage).
This guide sets up client-side encryption, configures a retention prune schedule, and explains why
garbage collection is a separate required step.
Step 1: Why Encryption Matters Beyond “Backups Exist”
PBS deduplicates and stores backup data as content-addressed chunks on its datastore. Without encryption, anyone with access to that datastore — a PBS box itself compromised, or its underlying storage — can read your VM data directly. Client-side encryption means Proxmox encrypts data before it ever leaves the source node, so the PBS server only ever stores ciphertext it cannot itself decrypt.

Step 2: Generate an Encryption Key
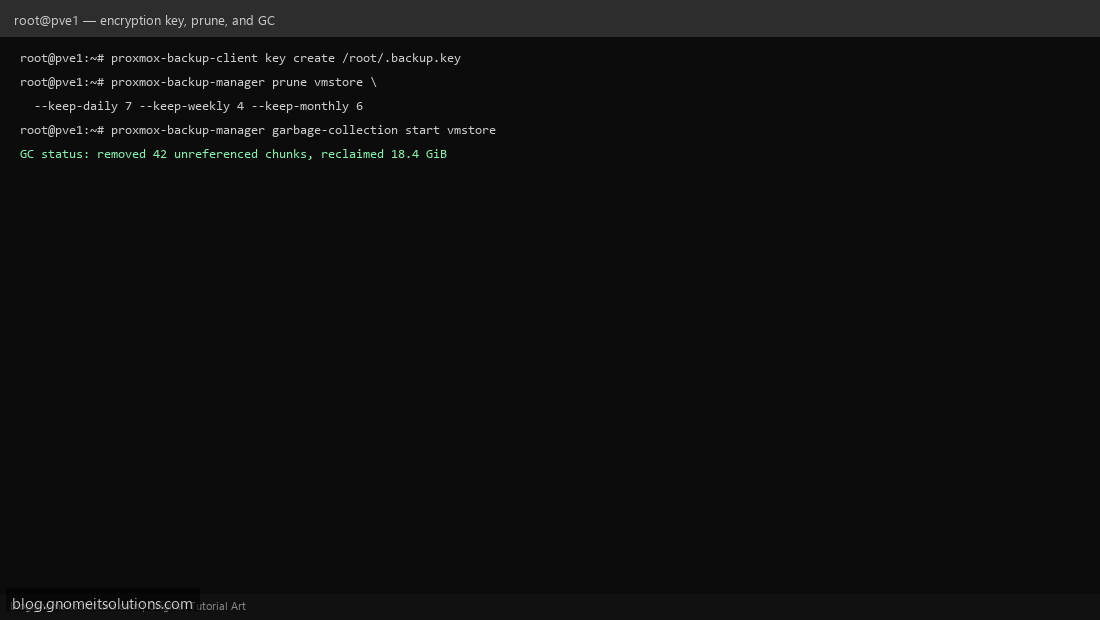
On the Proxmox VE node making backups (not the PBS server itself): proxmox-backup-client key create /root/.backup.key. This generates an encryption key file used to encrypt every backup chunk before upload. You can also generate and manage this through the Proxmox GUI under the PBS storage’s encryption settings.
Step 3: Register the Key Against Your PBS Storage
In Datacenter → Storage → your PBS storage entry → Edit, set the Encryption Key field to point at the key file you just created. From this point forward, backups to this storage target are encrypted automatically — no per-backup flag needed.
Step 4: Protect the Key — Losing It Means Losing Your Backups
This is the single most important operational fact about PBS encryption: there is no recovery if you lose the key. Encrypted backups become permanently unreadable, by design — that’s what makes the encryption real. Store a copy of /root/.backup.key somewhere durable and separate from the Proxmox node itself (a password manager, an offline vault) — the same discipline as the TFA recovery keys in our 2FA setup guide.
Step 5: Configure a Prune Schedule
Pruning defines your retention policy: proxmox-backup-manager prune vmstore --keep-daily 7 --keep-weekly 4 --keep-monthly 6 keeps the last 7 daily backups, 4 weekly, and 6 monthly snapshots, deleting anything older that doesn’t fit those buckets. Set this up as a scheduled job (Datacenter → Storage → your PBS entry → Prune) rather than running it manually — retention policy should be automatic and consistent.
Step 6: Understand Why Prune Alone Doesn’t Free Space
This surprises almost everyone new to PBS: pruning only removes the index/reference to old backup snapshots — the underlying data chunks those snapshots pointed to aren’t deleted immediately, because PBS’s deduplication means other, still-kept backups might reference those same chunks. Disk usage doesn’t visibly drop right after a prune runs, and that’s normal, not a bug.
Step 7: Run Garbage Collection to Actually Reclaim Space
Garbage collection (GC) is the separate step that scans the datastore, identifies chunks no longer referenced by any remaining backup snapshot, and deletes them: proxmox-backup-manager garbage-collection start vmstore. Schedule this to run regularly (Datacenter → Storage → your PBS entry → Garbage Collection) — typically weekly is plenty; running it too frequently just adds unnecessary I/O without much benefit since chunks only become collectible after a prune runs first.
Step 8: Verify a Restore Still Works
After your first full prune + GC cycle, actually test a restore of a backup you intended to keep — confirming your retention policy didn’t accidentally prune something you needed, and that encrypted backups restore correctly with your key in place. An untested backup policy is not a real backup policy, encrypted or not.
Command reference
# Generate an encryption key
proxmox-backup-client key create /root/.backup.key

# Prune (retention policy)
proxmox-backup-manager prune vmstore \
  --keep-daily 7 --keep-weekly 4 --keep-monthly 6

# Garbage collection (actually reclaims space, run after prune)
proxmox-backup-manager garbage-collection start vmstore
proxmox-backup-manager garbage-collection status vmstore
Related tutorials
- Proxmox Backup Server Setup Guide
- 3-2-1-1-0 Backup Rule for Proxmox
- Disaster Recovery Runbook: Restoring a Full Node
Image credits: All illustrations use original Proxmox VE branded artwork created
for Gnome IT Solutions — not copied from vendor marketing assets or third-party screenshots.
Tutorial text © Gnome IT Solutions.
Image credits: Screenshots are from the official
Proxmox VE documentation
(Proxmox GmbH), used under open documentation terms for educational purposes.
Tutorial text and layout © Gnome IT Solutions.