A default Proxmox install is reasonably safe, but it’s tuned for getting started quickly, not for
sitting on a network with any real threat exposure. This checklist walks through the concrete steps that
matter most: locking down SSH, tightening the firewall, adding fail2ban specifically for the web UI (a
frequent brute-force target), staying patched, and making sure the access-control and logging groundwork
from our other Proxmox security posts is actually in place.
Treat this as a checklist to work through once per new node, not a one-time read.
Step 1: Switch SSH to Key-Only Authentication
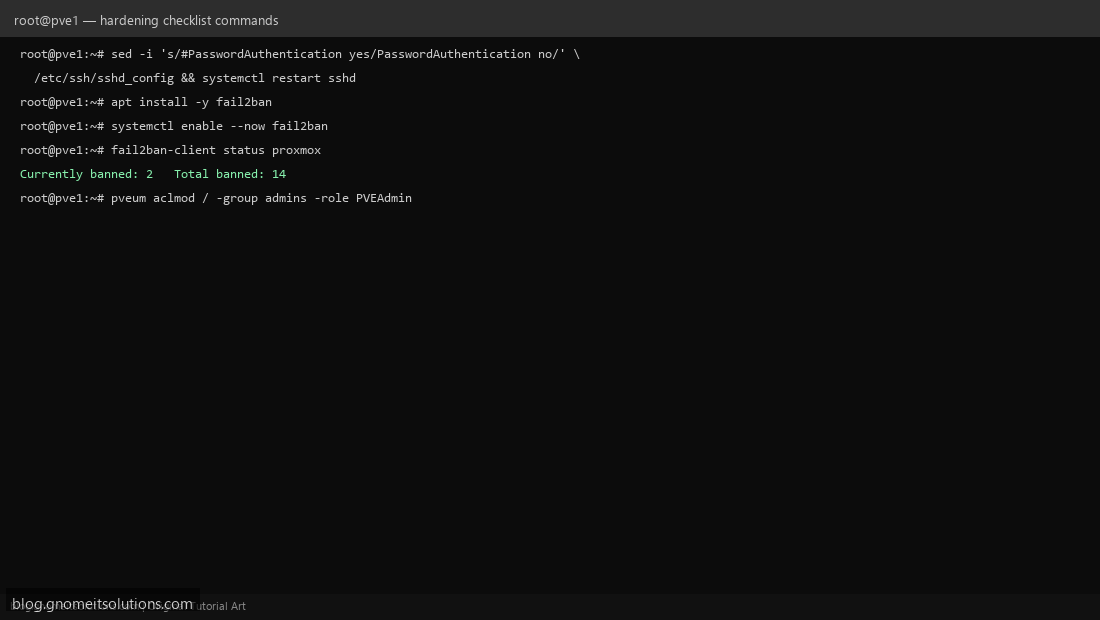
Password-based SSH is the most commonly brute-forced entry point on any internet-reachable Linux box. Set up key-based login (see our SSH key authentication guide), confirm you can log in with the key, then disable password auth entirely: set PasswordAuthentication no in /etc/ssh/sshd_config and restart sshd. Test in a second terminal before closing your current session, so you don’t lock yourself out on a typo.
Step 2: Restrict Web UI Access at the Network Level
The Proxmox web UI (port 8006) shouldn’t be reachable from the open internet at all in most setups — put it behind a VPN, restrict access with your edge firewall/router, or at minimum use the Proxmox Datacenter firewall (next step) to allow port 8006 only from known management IP ranges.
Step 3: Enable the Proxmox Firewall With Sane Defaults
Datacenter → Firewall → Options → enable the firewall with input policy DROP by default, then explicitly allow SSH (22), the web UI (8006), and any needed cluster/corosync ports only from trusted source IPs — see our firewall configuration guide for the full rule set. Default-drop means anything you forgot to allow simply doesn’t work, which is the safe failure mode.
Step 4: Install fail2ban for the Web UI
Proxmox ships a proxmox jail definition for fail2ban that watches pveproxy auth failures specifically — install fail2ban (apt install fail2ban), enable the jail, and confirm it’s active with fail2ban-client status proxmox. This automatically bans IPs hammering the login form, the same protection our fail2ban ban report script can help you monitor across your fleet.
Step 5: Stay on a Consistent Patching Cadence
Confirm you’re on the no-subscription or enterprise repo consistently (mixing repos across cluster nodes causes version drift and update failures — see our no-subscription repo guide), and set a regular cadence for apt update && apt dist-upgrade plus reviewing our safe major-version upgrade guide before jumping a full Proxmox version.
Step 6: Enable 2FA and Audit Permissions
Two settings-level controls close out most of the remaining gap: enable TOTP two-factor authentication for every admin account, and run through our permissions audit process to confirm no account has broader access than it actually needs. Both are quick to check periodically and catch the kind of privilege creep that accumulates silently over a year of ad-hoc account changes.
Step 7: Centralize Logging
Local logs on a compromised host can be tampered with or deleted by an attacker covering their tracks. Ship Proxmox host logs to a separate system — our Loki + Promtail guide works directly for this: install Promtail on each Proxmox node pointed at your central Loki instance, so auth logs, fail2ban bans, and system events survive even if the node itself is compromised afterward.
Step 8: Review the Checklist Periodically
Security hardening isn’t a one-time task — a new node joining the cluster needs the same SSH/firewall/fail2ban setup applied, a departing team member needs their access actually revoked (not just “disabled” and forgotten), and repo/patch drift creeps back in without a recurring check. Put a calendar reminder on this list, not just a one-time run-through.
Quick command reference
# SSH key-only
sed -i 's/#PasswordAuthentication yes/PasswordAuthentication no/' /etc/ssh/sshd_config
systemctl restart sshd

# fail2ban for the Proxmox web UI
apt install -y fail2ban
systemctl enable --now fail2ban
fail2ban-client status proxmox

# Confirm firewall is active
pve-firewall status
Related tutorials
- Proxmox Firewall Configuration
- Proxmox Two-Factor Authentication Setup
- Proxmox User Permissions and Roles
- Fail2ban Ban Report Shell Script
Image credits: All illustrations use original Proxmox VE branded artwork created
for Gnome IT Solutions — not copied from vendor marketing assets or third-party screenshots.
Tutorial text © Gnome IT Solutions.
Image credits: Screenshots are from the official
Proxmox VE documentation
(Proxmox GmbH), used under open documentation terms for educational purposes.
Tutorial text and layout © Gnome IT Solutions.