
Our systemd timers guide covered scheduled tasks — this guide covers the more common case: a long-running process you want systemd to manage like any built-in service — start on boot, restart automatically if it crashes, and show up cleanly in systemctl status and journalctl. Whether it’s a custom app, a Node/Python/Go binary, or a script that needs to run continuously, a proper unit file beats a fragile nohup ... & or a cron job that only checks in periodically.
This guide writes one from scratch, covers restart behavior, environment variables, logging, and dependency ordering.
Step 1: When You Need a Custom Unit vs Cron or tmux
A custom systemd service fits a process meant to run continuously (a web app, an API server, a background worker) — not a one-off scheduled task (that’s what our systemd timers guide covers) and not an interactive session you want to keep alive across disconnects (that’s what our tmux guide is for). A real service unit gives you automatic restart on crash and automatic start on boot — neither cron nor tmux does either of those.

Step 2: Anatomy of a Unit File
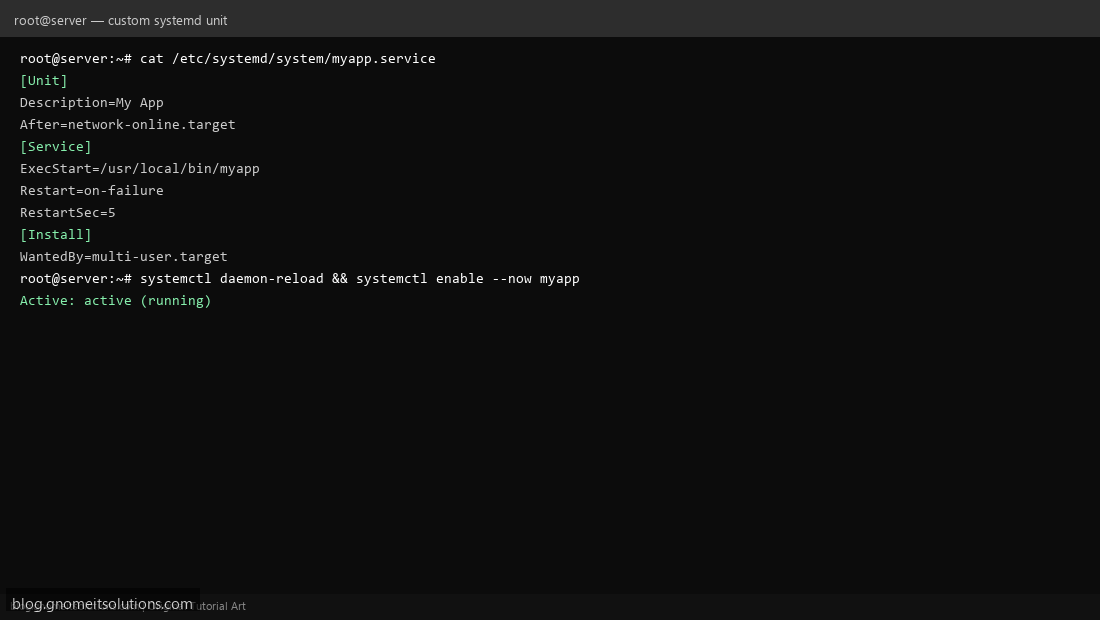
A service unit has three sections: [Unit] (metadata and dependency ordering — Description=, After=), [Service] (how to actually run it — ExecStart=, restart behavior, environment), and [Install] (how it hooks into boot targets — WantedBy=multi-user.target for a normal server process).
Step 3: Write a Simple Service
Create /etc/systemd/system/myapp.service with Type=simple (the default — systemd considers the service started as soon as the main process launches, appropriate for most long-running processes that don’t fork/daemonize themselves) and ExecStart=/usr/local/bin/myapp pointing at your actual binary or script with an absolute path.
Step 4: Configure Restart Behavior
Restart=on-failure tells systemd to automatically restart the process if it exits with a non-zero code or crashes (use Restart=always if you want it restarted even after a clean exit, which is unusual for a service meant to run forever). RestartSec=5 waits 5 seconds between restart attempts, avoiding a tight crash-loop that could hammer a downstream dependency (like a database it can’t yet reach) repeatedly with no delay.
Step 5: Set Environment Variables and Working Directory
Add Environment=NODE_ENV=production lines directly in the unit file for a few variables, or EnvironmentFile=/etc/myapp/env to load many from a separate file (keeps secrets out of the unit file itself, and out of systemctl cat output visible to any user who can read unit files). Set WorkingDirectory=/opt/myapp if the process expects to run from a specific directory for relative file paths to resolve correctly.
Step 6: Logging Through journald
By default, anything the process writes to stdout/stderr is automatically captured by systemd’s journal — no manual log file setup needed. View it with journalctl -u myapp -f to follow live output, exactly like our systemd timers guide showed for scheduled jobs. If the app already writes its own log files, that’s fine too — both can coexist, journald just gives you the same command-line workflow for every systemd-managed service regardless of how it logs internally.
Step 7: Enable, Start, and Check Status
After creating or editing the unit file, always run systemctl daemon-reload first — systemd caches unit file contents and won’t pick up changes otherwise. Then systemctl enable --now myapp both starts it immediately and enables it for future boots. Confirm with systemctl status myapp — look for Active: active (running), not just that the command didn’t error.
Step 8: Dependencies and Resource Limits
If your app needs the network or a database available first, add After=network-online.target (ordering only — doesn’t guarantee readiness, just startup order) or After=postgresql.service for a local dependency. For resource control, MemoryMax=512M and CPUQuota=50% in [Service] cap what the process can consume — useful for a background worker you don’t want starving the rest of the box during a runaway condition.
Complete example unit file
[Unit]
Description=My App
After=network-online.target postgresql.service

[Service]
Type=simple
ExecStart=/usr/local/bin/myapp
WorkingDirectory=/opt/myapp
EnvironmentFile=/etc/myapp/env
Restart=on-failure
RestartSec=5
MemoryMax=512M

[Install]
WantedBy=multi-user.target
Command reference
systemctl daemon-reload
systemctl enable --now myapp
systemctl status myapp
journalctl -u myapp -f
Related tutorials
Terminal screenshots are original illustrations created for Gnome IT Solutions (blog.gnomeitsolutions.com).